
 Save Pin
Dyeing Easter Eggs with Onion Skins is a beautiful way to celebrate spring while giving food scraps new life. This cherished method from my family makes for stunning marbled eggs using only natural kitchen ingredients and herbs for delicate patterns.
I still remember gathering onion skins and searching for the prettiest leaves with my grandmother before Easter. It is as much about the togetherness as the finished eggs.
Ingredients
- One dozen white eggs: for the brightest color and easiest pattern visibility
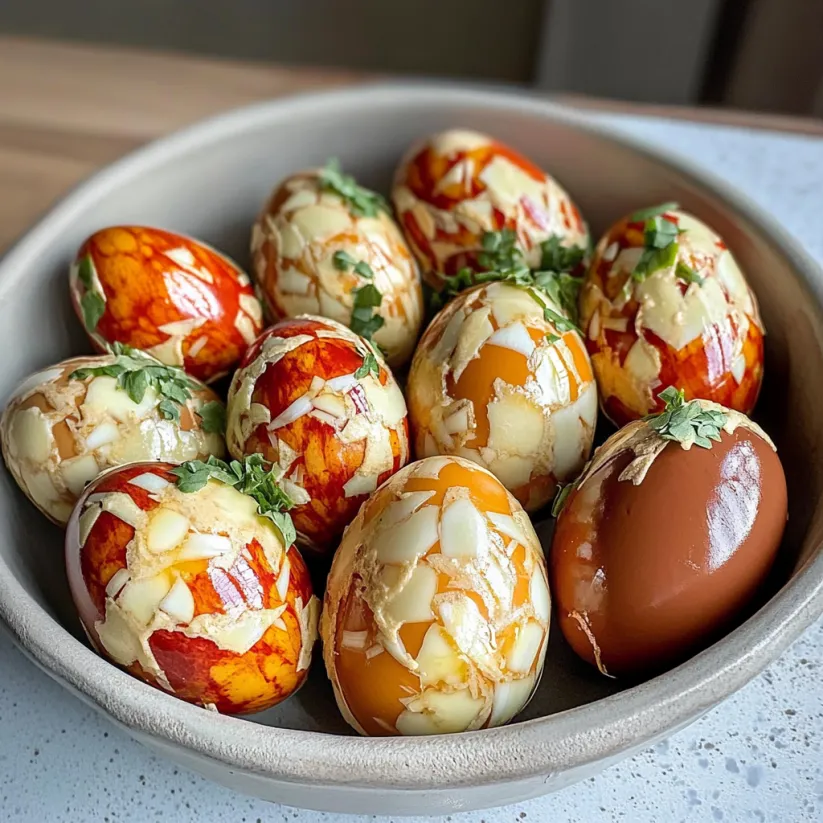
- Three cups packed onion skins: from both yellow and red onions will give the richest dye if you mix varieties
- Two teaspoons white vinegar: which helps set the dye and create vivid color
- Two quarts water: enough to fully submerge eggs in your pot
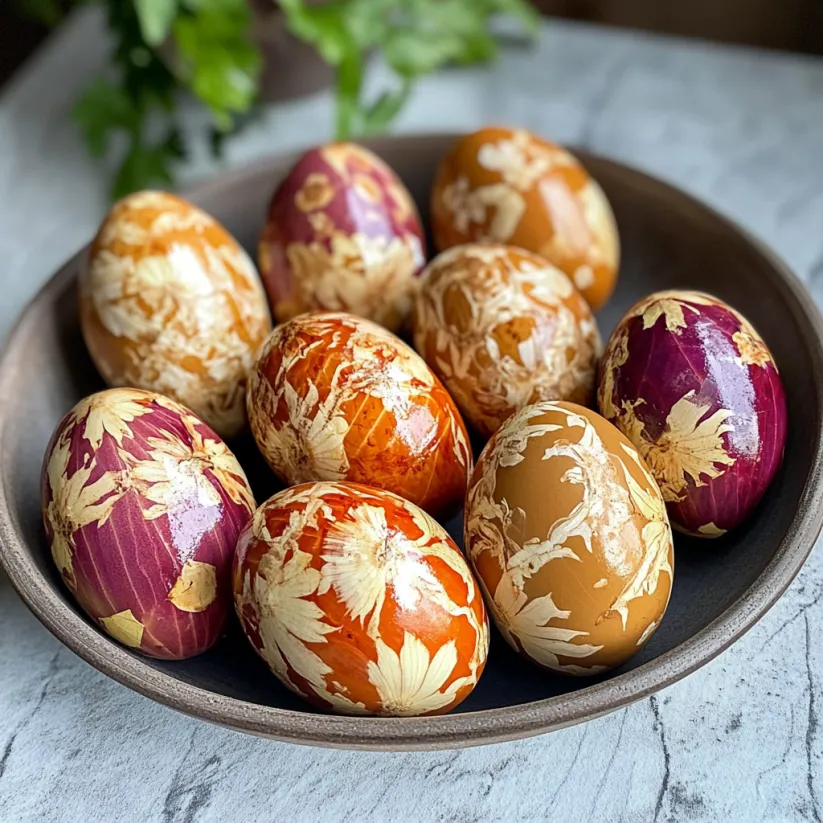
- Herbs with distinctive shapes like parsley or dill: these create lovely natural imprints on the egg surface try for crisp fresh leaves from your garden or store
- A little oil for shine: helps bring out the eggs stunning colors at the end use a neutral oil that will not add extra scent
- Tips for buying quality eggs: are to look for uncracked smooth shells since imperfections may spoil the final design
Step-by-Step Instructions
- Prepare the Eggs:
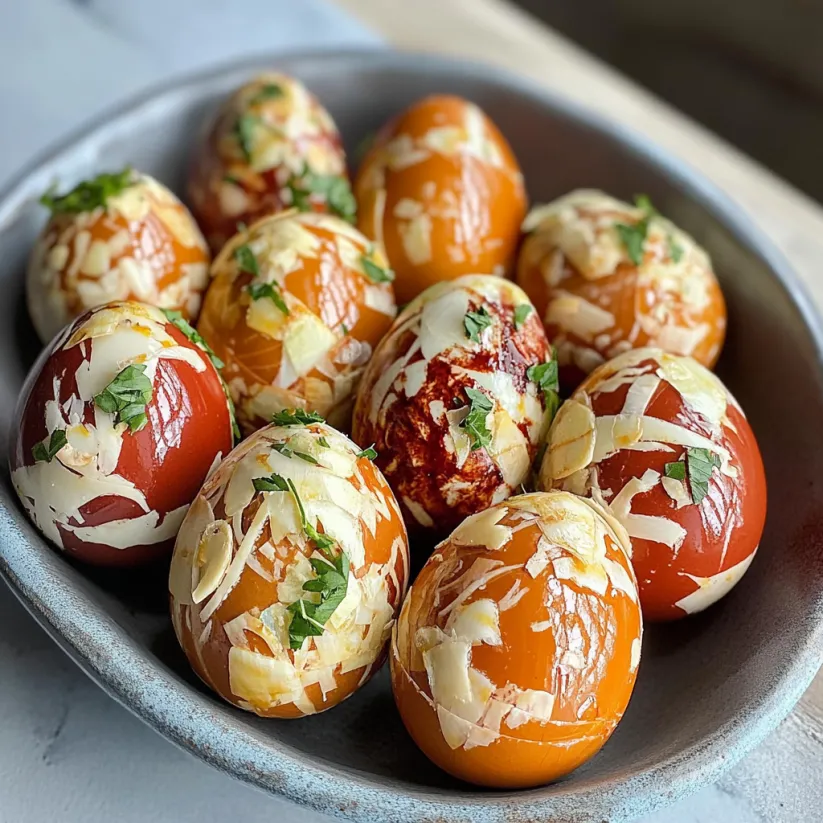
- Wash eggs gently with lukewarm water and dry completely. Press a fresh herb leaf flat onto each egg. Dab the leaf with a damp finger so it sticks smoothly to the shell with no air pockets.
- Wrap in Nylon:
- Cut nylon stocking into pieces big enough to wrap each egg. Slip each egg into a stocking segment making sure the herb leaf stays flat. Pull the nylon snug so the pattern stays in place and secure the ends by tying with thread or a twist tie.
- Arrange Skins and Eggs:
- Layer onion skins over the bottom of a large pot. Arrange the wrapped eggs gently on top of the skins then scatter remaining onion skins over the eggs. Pour in enough water to cover everything thoroughly and stir in the vinegar.
- Simmer and Steep:
- Bring the pot to a gentle boil over medium high heat. Lower to a simmer and cook for ten minutes. Cover the pot and let the eggs steep for thirty minutes longer so the shells soak up the dye and the patterns set deeply.
- Finish and Shine:
- Remove eggs with a slotted spoon and let cool just until you can handle. Carefully remove the nylon and herbs to reveal patterns. Dip a paper towel in oil and rub over each egg to make the colors and designs pop.
 Save Pin
My favorite eggs are always the ones where the dill leaves leave sharp lacework patterns across the shell. Passing these to family at brunch is a highlight of my holiday every year.
Storage Tips
After dyeing and oiling pat eggs dry and refrigerate right away. Unpeeled eggs are safe to eat for a week. The color may soften a bit over time but the patterns hold well if you handle them gently. Store in a covered container to prevent the shells from absorbing refrigerator odors.
Ingredient Substitutions
If you cannot find red onion skins just use yellow but the red will add a deeper rusty tone. For leaves try whatever is freshest and most plentiful in your area—carrot tops parsley cilantro or even small wildflowers work if they have a strong outline. Brown eggs will take color but the results will be subtler.
 Save Pin
Serving Suggestions
Place finished eggs in a wide basket with extra herbs and a few flowers for an easy centerpiece. They are pretty on a brunch buffet or as a meaningful hostess gift alongside a loaf of homemade bread. I love using them for an Easter egg hunt—kids get so excited to see which patterns they find.
Cultural and Historical Roots
Many Eastern European cultures use dyed onion skin eggs to mark the end of Lent and celebrate renewal. The tradition honors both the beauty in kitchen scraps and the joy in simple handmade crafts passed between generations. You may find variations using rice grains or other botanicals to create amazing effects.
Commonly Asked Questions
- → Why use onion skins for coloring eggs?
Onion skins produce deep, natural shades that are safe, eco-friendly, and richly hued, enhancing every egg.
- → How do I get detailed leaf patterns on the shells?
Press fresh herbs against the eggs, secure with nylon stockings, and boil them together for distinct botanical patterns.
- → Which herbs work best for creating shapes?
Parsley, dill, clover, and similar flat-leaf herbs create pretty silhouettes once removed after dyeing.
- → Can I use brown eggs instead of white?
White eggs show the dye colors and herb patterns best, but brown eggs will also take on beautiful, earthy tones.
- → Is it safe to eat the colored eggs?
Yes, onion skins and herbs are safe for coloring, and the eggs remain perfectly edible after dyeing and peeling.
- → How long will these eggs keep?
Refrigerated, the decorated eggs last up to a week. Enjoy their beauty at your table or as gifts.