
 Save Pin
Summer afternoons always take me back to my grandmother’s kitchen, where she crafted the easiest and most crowd-pleasing no-bake dessert bars. With simple ingredients and no oven required, these bars deliver sweet satisfaction whenever you need dessert in a hurry for family gatherings, parties, or an after-dinner treat.
You will love how simple yet impressive these bars are. I was first drawn to no-bake bars as a busy student and now I make them whenever friends pop by unexpectedly. They’re always a hit.
Ingredients
- Graham cracker crumbs: provide a crumbly and sturdy base use fresh packages for best flavor
- Creamy peanut butter: offers silkiness and helps hold everything together go for natural brands if possible
- Chocolate chips: bring classic richness choose high-quality chips for best melting and taste
- Powdered sugar: sweetens the mix without grit always sift before measuring
- Butter: adds smoothness and helps with binding unsalted is preferred for more control over sweetness
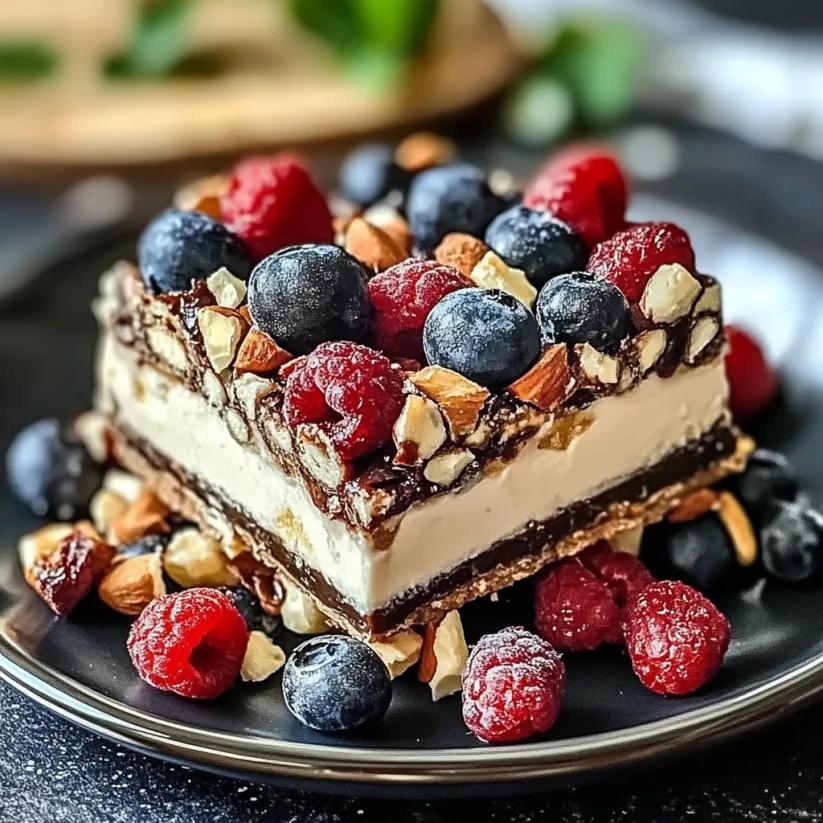
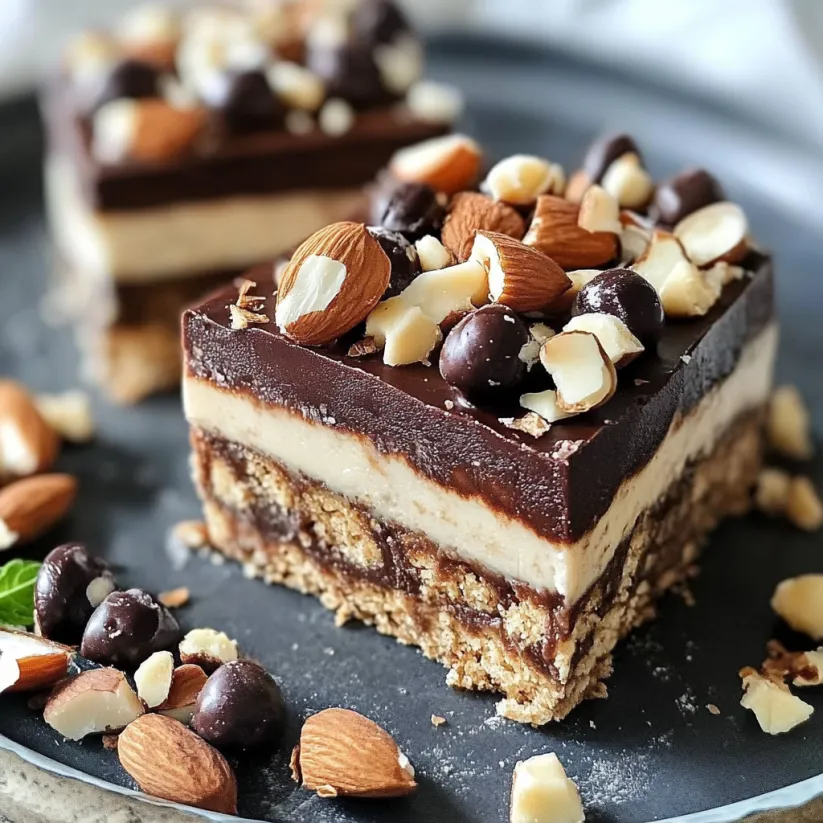
- Garnishes like chopped almonds or berries: give a colorful finish and extra crunch pick the freshest toppings for a professional look
Step-by-Step Instructions
- Prepare the Base:
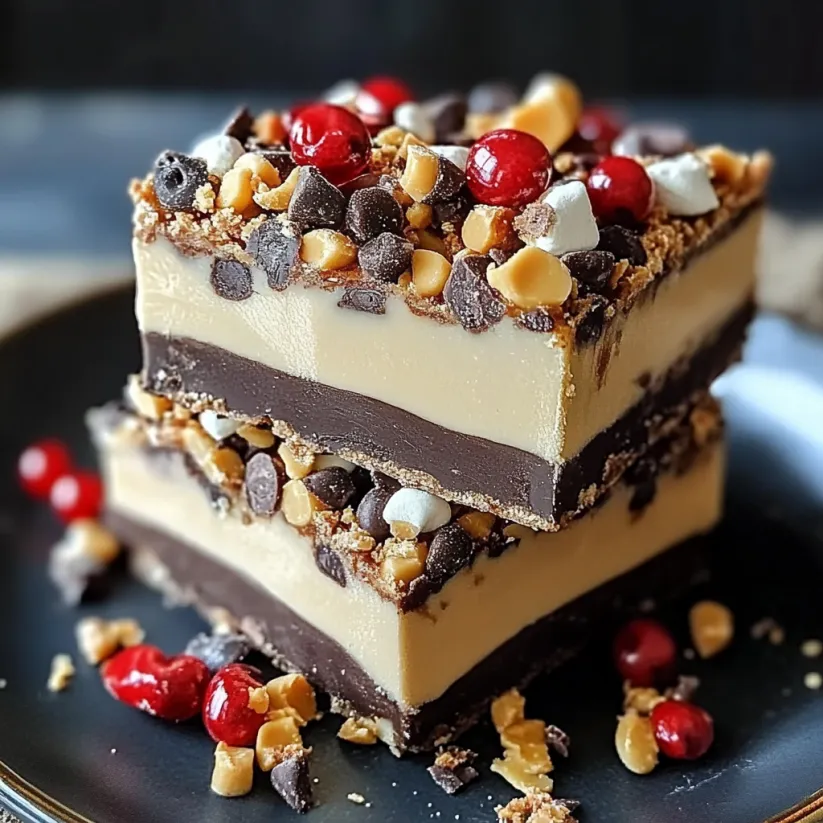
- Line a square or rectangular pan completely with parchment paper letting extra hang over the sides so removing the bars is easy. Melt the butter in a saucepan on very low heat then remove it as soon as melted. Mix the butter carefully with graham cracker crumbs and powdered sugar in a large mixing bowl. Stir until completely combined and the mix resembles damp sand. Press the mixture evenly and firmly into the pan using a flat-bottomed glass or spatula for a smooth layer.
- Make the Filling:
- Add creamy peanut butter to a separate microwave safe bowl. Microwave in twenty to thirty second bursts until just softened and easily stirred. Gently fold in half the chocolate chips so they melt only partially for a glossy swirl. Spread this peanut butter filling evenly over your prepared base.
- Add the Chocolate Top:
- Melt the remaining chocolate chips in the microwave in short increments stirring between bursts to avoid burning. When smooth pour over the peanut butter layer and immediately smooth it with a spatula. If using chopped nuts or seasonal fruit sprinkle them quickly before the chocolate sets.
- Chill and Slice:
- Place the pan in the coldest part of your fridge for at least two hours. The longer you chill the firmer the bars will be. When set lift out the bars using the parchment then use a large sharp knife dipped in hot water and wiped dry to cut perfect slices.
 Save Pin
These bars are my go-to treat when summer brings surprise visitors. Nothing beats watching my family gather around the table eager to try new additions like fruity toppings or crunchy seeds.
Storage Tips
After slicing arrange bars in a single layer in an airtight container. For longer pantry life place parchment between each layer to keep them from sticking and store in the fridge for up to a week. If freezing wrap each bar in parchment before sealing them in a freezer bag. They thaw perfectly overnight in the fridge.
Ingredient Substitutions
Experiment with cookie crumbs instead of graham crackers for a whole new flavor. If you want a nut free version use sunflower seed butter. For a lighter twist try swapping in white chocolate chips or adding a swirl of fruit jam between the layers.
Serving Suggestions
Serve the bars cold for best flavor and texture. Stack on a dessert tray with fresh berries or scatter edible flowers for a party look. For kids lunches cut into bite size cubes and wrap individually for grab-and-go treats.
 Save Pin
History Behind No-Bake Bars
No-bake dessert bars became popular when frugal cooks needed easy recipes during hot summer months or had limited time and ingredients. Their charm comes from the endless combinations possible and the way they bring all ages together for a sweet moment.
Commonly Asked Questions
- → What tools do I need to make no-bake bars?
You'll need a 9×9 inch pan, mixing bowl, spatula, and a refrigerator. A sharp knife helps with neat slicing.
- → Can I make these bars gluten-free or vegan?
Yes! Use gluten-free crackers, plant-based binders, and dairy alternatives for vegan or allergy-friendly options.
- → How do I store dessert bars to keep them fresh?
Wrap bars individually and keep them in an airtight container in the fridge for up to a week. They also freeze well.
- → What binds the bars together?
Common agents include peanut butter, condensed milk, melted chocolate, or marshmallows—all help give structure and chew.
- → How can I customize the flavors?
Try adding dried fruit, different nuts, coconut, cereal, or spices. Swapping chocolates or nut butters also changes things up.
- → Why didn't my bars set properly?
Check your wet-to-dry ratio and chill time; too much liquid or not enough time in the fridge can make bars too soft.