
 Save Pin
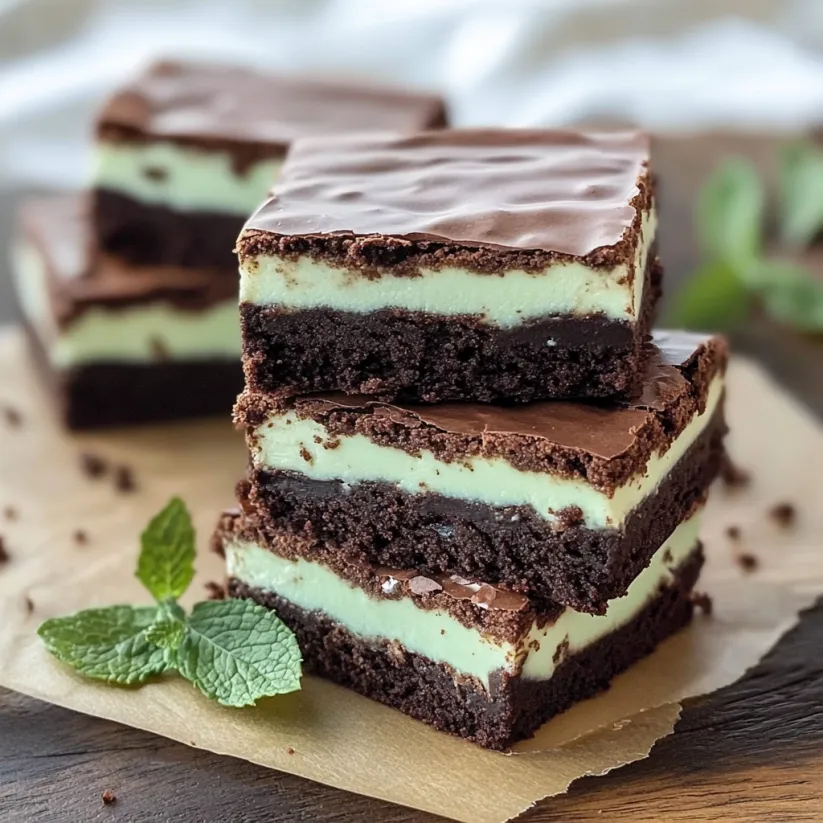
These mint brownies have been a showstopper dessert in my house for years, combining the classic fudgy texture of brownies with a refreshing mint layer and glossy chocolate topping that creates an irresistible Andes mint-inspired treat.
I first made these brownies for a holiday party where they disappeared within minutes. The vibrant green mint layer always brings a smile to guests' faces, and I've been asked for the recipe countless times since.
Ingredients
For The Brownies
- Unsalted butter creates a rich, moist base for the brownies
- Unsweetened bakers chocolate provides deep chocolate flavor without excessive sweetness
- Room temperature eggs for proper incorporation and better rise
- Vanilla extract enhances the chocolate notes
- Granulated sugar balances the unsweetened chocolate
- Whole wheat pastry flour adds a subtle nuttiness while keeping brownies tender
- All-purpose flour provides structure
For The Mint Layer
- Softened butter helps create a smooth, creamy texture
- Powdered sugar dissolves completely for a silky mint frosting
- Milk thins the mixture to spreadable consistency
- Pure peppermint extract gives authentic mint flavor without tasting artificial
- Green food coloring creates the signature look but can be omitted if preferred
For The Chocolate Topping
- Unsweetened chocolate creates a rich finish that balances the sweet mint layer
- Unsalted butter helps the topping spread easily and adds shine
Step-by-Step Instructions
- Prepare the Pan
- Heat your oven to 350°F and thoroughly grease your 8×8 pan. I prefer using butter for greasing as it adds flavor and ensures perfect removal. Make sure to get into the corners where brownies tend to stick.
- Create the Brownie Base
- Set up a double boiler by placing a heat-proof bowl over simmering water without letting the bowl touch the water surface. This gentle heat prevents scorching the chocolate. Melt butter and chocolate together, stirring frequently until completely smooth. This mixture must cool completely before adding eggs to prevent scrambling them.
- Build the Batter
- Add eggs one at a time, allowing each to fully incorporate before adding the next. This creates proper emulsion for a fudgy texture. Beat in vanilla and sugar until the mixture becomes slightly lighter in color. Gently fold in both flours just until combined to avoid developing gluten which would make brownies tough.
- Bake to Perfection
- Spread the batter evenly in your prepared pan, taking time to push it into corners for uniform thickness. Bake until a toothpick comes out clean but not completely dry. Overbaking is the enemy of fudgy brownies. The middle should appear set but still have moisture. Cool completely before adding the mint layer.
- Create the Mint Layer
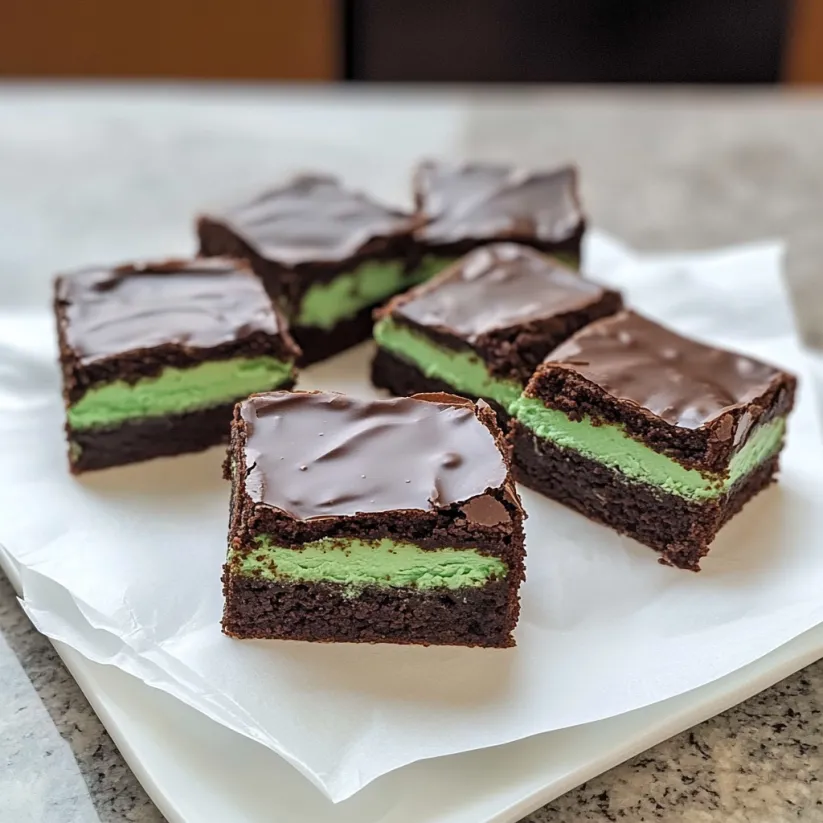
- Beat softened butter and powdered sugar until light and fluffy, about 2 minutes. Add milk and peppermint extract gradually, tasting as you go to achieve your preferred mint intensity. Add food coloring drop by drop until you reach the desired shade of green. Spread this mixture in an even layer over cooled brownies and refrigerate until firm to the touch.
- Apply the Chocolate Topping
- Gently melt chocolate and butter together until completely smooth. Pour over the chilled mint layer and quickly spread into a thin, even coating. This works best when the mint layer is thoroughly chilled to prevent the layers from mixing. Refrigerate again to set the chocolate before cutting.
 Save Pin
The peppermint extract quality makes all the difference in these brownies. I once used an artificial version and immediately regretted it. Pure peppermint extract gives that authentic cooling sensation that makes these brownies extraordinary.
The Secret to Perfect Layers
Many people rush the chilling process between layers, which leads to messy, mixed results. Each layer needs time to set properly before adding the next. I refrigerate the brownie base for at least 30 minutes before adding the mint layer, then another 30 minutes before the chocolate topping. This patience creates those distinct, beautiful layers that make these brownies so impressive.
Serving Suggestions
While these brownies are perfect on their own, they transform into an elegant dessert when served with a scoop of vanilla ice cream. For special occasions, I garnish with fresh mint leaves and a light dusting of powdered sugar. These brownies pair wonderfully with coffee or hot chocolate, with the mint cutting through the richness perfectly.
Variations to Try
The basic structure of these brownies opens up possibilities for customization. Replace the mint with orange extract and orange food coloring for chocolate-orange brownies. During the holidays, I sometimes add a drop of peppermint oil to the chocolate topping for extra mint intensity. White chocolate can be substituted for the top layer for a striking color contrast against the green mint layer.
 Save Pin
Commonly Asked Questions
- → Can I use regular all-purpose flour instead of whole wheat pastry flour?
Yes, the recipe specifically notes you can substitute additional all-purpose flour for the whole wheat pastry flour in equal amounts. The whole wheat pastry flour adds a subtle nuttiness, but the brownies will be equally delicious using only all-purpose flour.
- → How do I know when the brownies are properly baked?
The brownies are done when the middle appears set and a toothpick inserted in the center comes out clean, typically after 20-25 minutes of baking. Be careful not to overbake as this can dry out the fudgy texture.
- → Can I omit the green food coloring?
Absolutely! The green food coloring is purely for visual appeal to indicate the mint flavor. Omitting it won't affect the taste at all, though the middle layer will remain white instead of mint-green.
- → How long should I refrigerate between adding each layer?
Refrigerate the mint layer until it feels firm to the touch, typically 30-45 minutes. After adding the chocolate topping, refrigerate again until completely set, about 1 hour. Proper chilling ensures clean cuts and distinct layers.
- → Why do my brownies crack when I cut them?
If the chocolate topping cracks during cutting, try letting the brownies sit at room temperature for 5-10 minutes before slicing. You can also warm your knife under hot water, dry it, and then cut for cleaner slices through the chocolate layer.
- → Can I use mint extract instead of peppermint extract?
While you can substitute mint extract, be aware that mint extract often contains both peppermint and spearmint oils, which will give a slightly different flavor profile than pure peppermint. Start with a smaller amount (around 1/2 teaspoon) and adjust to taste.