
 Save Pin
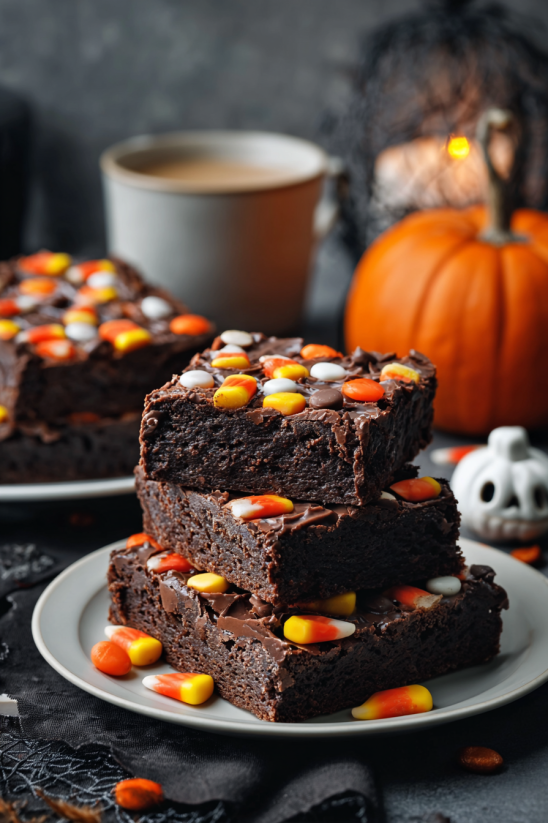
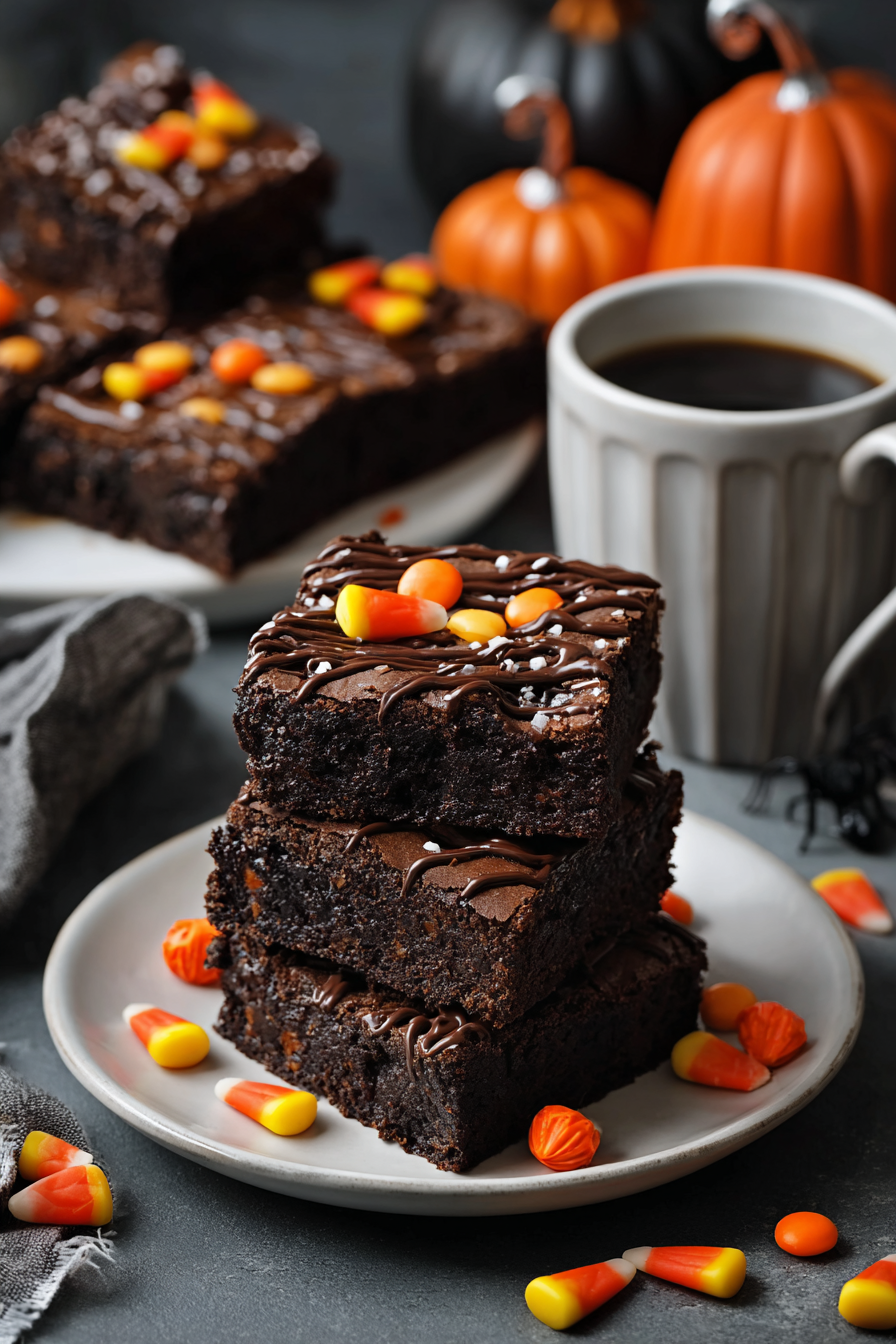
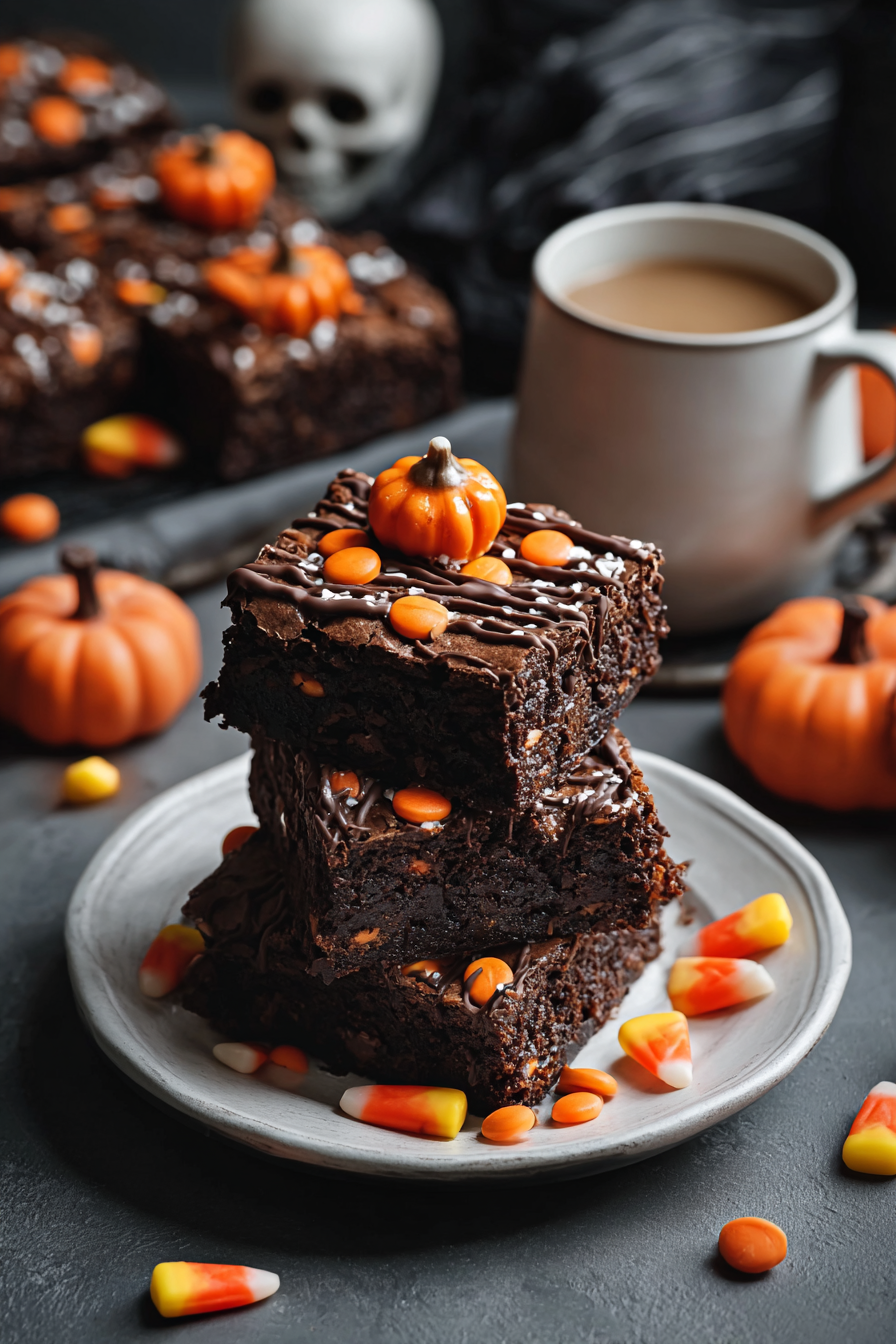
Haunted House Brownies bring together the thrill of Halloween with rich dark chocolate and playful candy toppings for a dessert that always wows a party crowd. Each bite is extra fudgy and dense thanks to generous dark chocolate chips. Marshmallows provide a chewy bite and the colorful decorations make these brownies a spooky showstopper on any haunted house table. This recipe is my go-to when I am hosting my kids’ Halloween parties and want a batch of treats that are both festive and easy to assemble.
I always bake these Haunted House Brownies with my kids watching as the black icing and candies go on top. Every year our kitchen smells like chocolate and marshmallows and it feels like Halloween magic.
Ingredients
- Unsalted butter melted: This gives the brownies a rich flavor and moist texture Choose good quality butter for best results
- Granulated sugar: For sweetness and that classic shiny brownie crust
- Cocoa powder: Dark unsweetened cocoa creates a deep base flavor Use Dutch-processed for an intense result
- Vanilla extract: Boosts all the chocolatey notes Look for pure vanilla not imitation
- Large eggs: Give structure and chew to the brownies Fresh eggs work best
- All-purpose flour: Provides just enough body without making brownies cakey
- Baking powder: Lifts the brownies as they bake so they do not turn out too dense
- Salt: Balances the sweet and brings out all the chocolate notes
- Dark chocolate chips: Boosts chocolate richness and melt into gooey pockets in every bite Use the darkest chocolate chips you enjoy
- Assorted Halloween candies: Think candy corn gummy worms mini marshmallows and sprinkles Choose bright and spooky options
- Black and orange icing: For a haunted manor effect Use gel food coloring for vivid icing hues
- White chocolate chips: Perfect for drizzling spiderwebs or ghostly touches
- Food coloring: Optional but fun for customizing the decorating icing Pick gel for best color payoff
Step-by-Step Instructions
- Prep the Pan and Oven:
- Preheat your oven to 350 degrees Fahrenheit which ensures the brownies bake evenly not too fast Set up a 9 by 13 inch baking dish with a layer of parchment paper so you get easy removal later
- Make the Base Mixture:
- In a large mixing bowl whisk together melted butter and sugar for about one minute until the mixture looks smooth and glossy Add the cocoa powder and vanilla blending so no lumps of cocoa remain
- Incorporate the Eggs:
- Crack in your eggs one at a time whisking well after each addition until every egg disappears before adding the next Doing this creates a rich and cohesive batter
- Add Dry Ingredients:
- Sprinkle the flour baking powder and salt over the wet ingredients in two or three additions mixing gently just until you see no dry flour Be careful not to overmix or the brownies could become tough
- Stir in the Chocolate Chips:
- Fold your dark chocolate chips into the batter ensuring each scoop has chocolate in every bite Do not overmix
- Spread and Bake:
- Smooth the batter evenly into your prepared pan making sure the batter gets all the way into every corner Place the pan on the center rack in your oven and bake for 25 to 30 minutes A toothpick poked in the center should come out with moist crumbs Not wet batter
- Cool and Decorate:
- Let the brownie slab cool completely in its pan This makes cutting and decorating much easier Spread a generous layer of black icing over the surface then swirl on orange icing Artfully place your Halloween candies on top for texture and color Drizzle melted white chocolate chips for extra spooky webs or ghost shapes
- Set and Serve:
- Let the brownies rest for at least 10 minutes so the icing sets up gently Use a large knife to cut into squares and share all your haunted creations
 Save Pin
The dark chocolate chips are my secret for those bites that almost taste like fudge My daughter loves dusting the brownies with sprinkles and every year our haunted house batch turns out different Sometimes there is more candy corn sometimes more ghost marshmallows but every time it disappears fast
Storage Tips
Once decorated store brownies in an airtight container at room temperature for up to three days They stay chewy thanks to the marshmallows For longer storage keep them in the fridge The icing might firm up but you can let them soften briefly at room temperature before serving If you need to make them ahead you can freeze the plain brownies without icing and add all your decorations after thawing
Ingredient Substitutions
You can swap dark chocolate chips for semi sweet chips if you want a milder flavor For gluten free needs use a one-to-one gluten free flour blend If you run out of Halloween candies just use mini chocolate chips extra marshmallows or pretzel sticks for a graveyard look
Serving Suggestions
Serve squares right off the decorated tray for a festive centerpiece Or wrap individual brownies in clear bags with ribbon for a party favor These brownies also look great on a black platter with plastic spiders or edible glitter for a haunted touch
 Save Pin
Commonly Asked Questions
- → How do I achieve a decadent, fudgy brownie base?
Use melted butter and cocoa powder, then stir in dark chocolate chips for an intense, moist texture.
- → What candies work best for decorating brownies for Halloween?
Try using candy corn, gummy worms, mini marshmallows, colored sprinkles, and black or orange icing for themed flair.
- → How can I create a ghostly appearance on the brownies?
Arrange mini marshmallows on top, then use black icing to draw ghost faces or drizzle with white chocolate for a spooky effect.
- → Should the brownies cool before decorating?
Yes, let them cool completely before icing and adding candies to prevent melting and smudging.
- → How do I ensure clean brownie squares for serving?
Allow the icing and chocolate to set, then use a sharp knife wiped clean between cuts for neat slices.