
 Save Pin
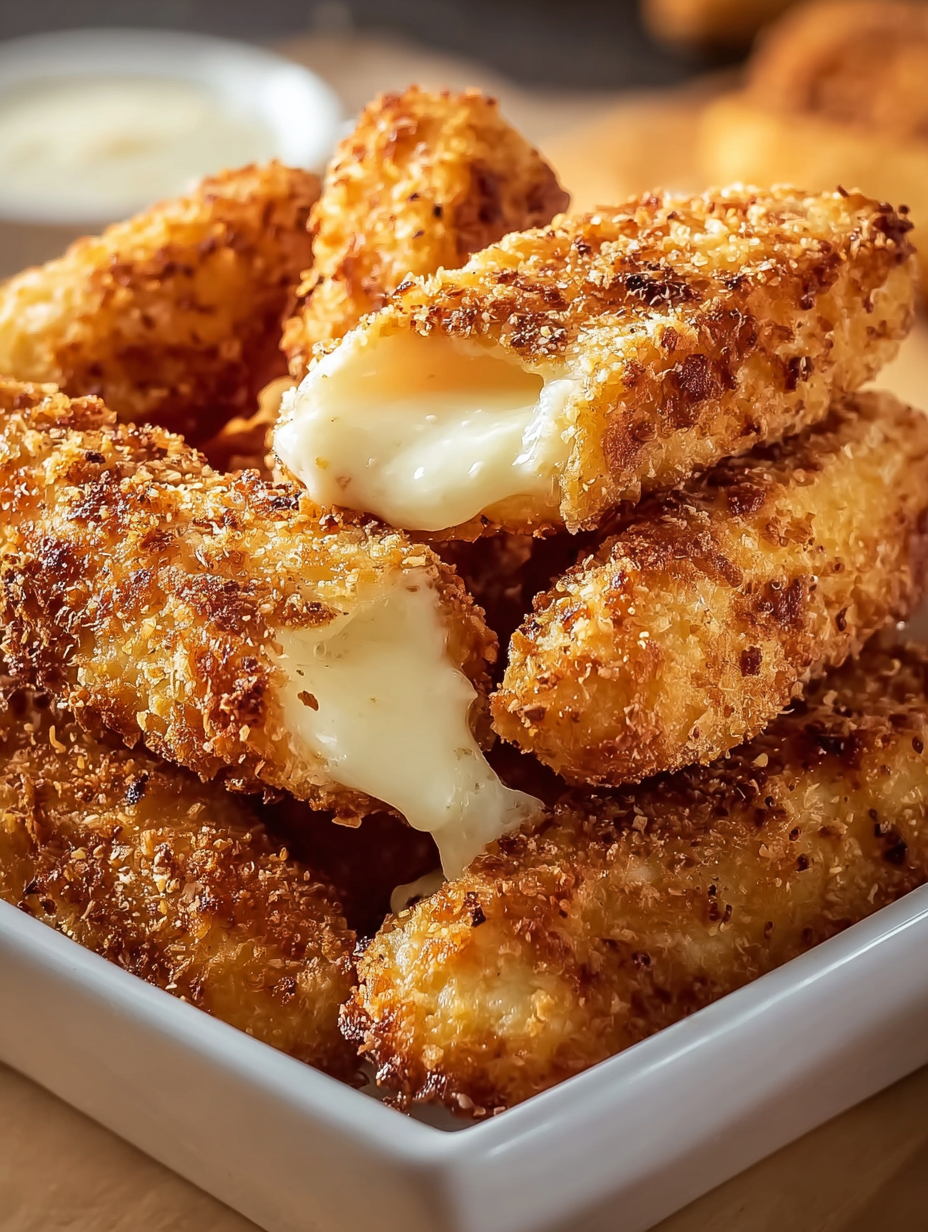
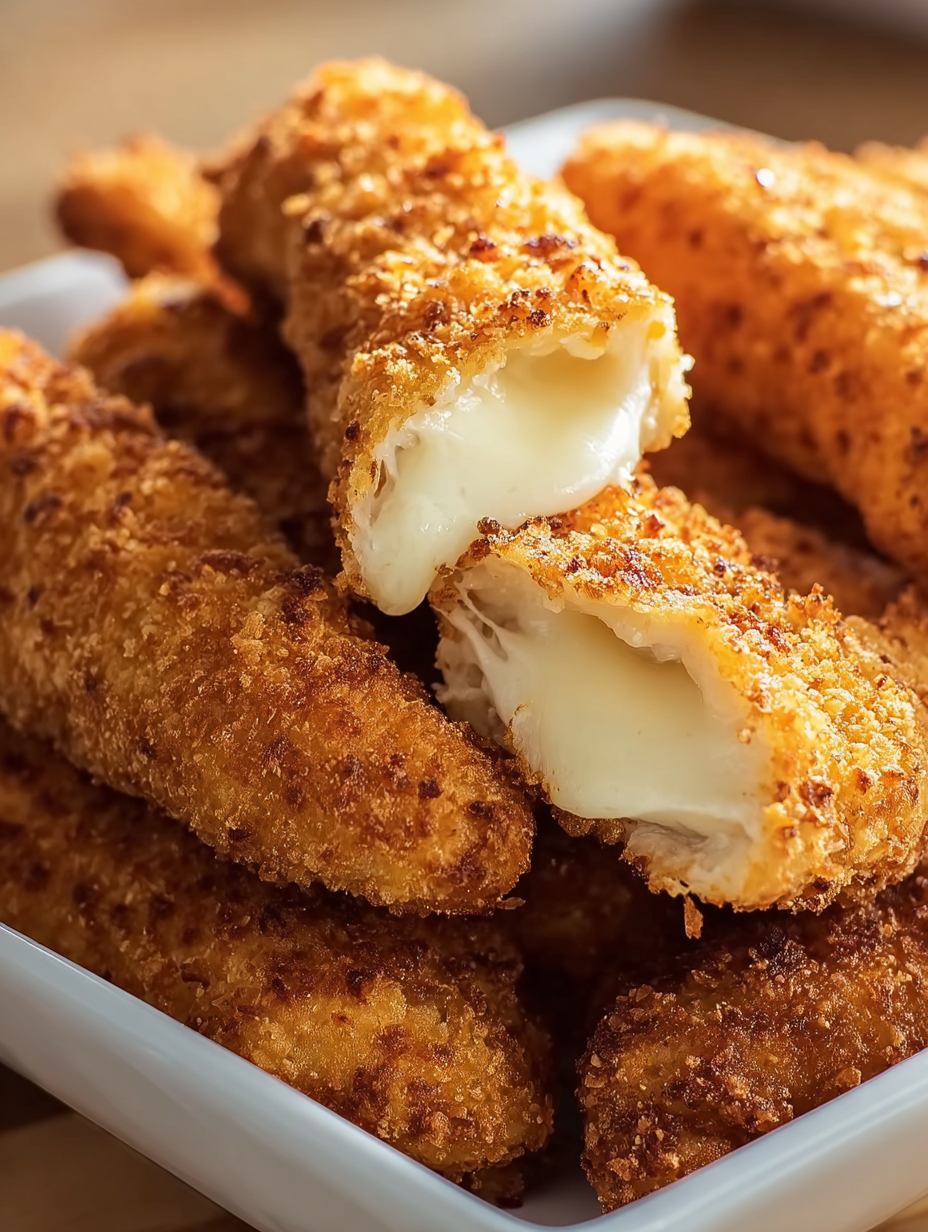
These Crispy Ranch Parmesan Tenders turn simple chicken into golden, crunchy perfection with bold ranch flavor and cheesy goodness in every bite. They are perfect for busy weeknights, game days, or any time you want a crowd-pleasing dish your whole family will love.
I first made these when looking for a quick dinner that the kids would actually eat without complaint. They loved them so much they asked for these tenders weekly, and now they’re a staple in our meal rotation.
Ingredients
- Chicken tenderloins: about 1.5 to 2 pounds for juicy, tender pieces
- Salted butter: melted to help the coating stick and add richness, use high-quality butter for best flavor
- Cooking spray or oil mist: to achieve that extra crunchy finish
- Corn flakes cereal: crushed finely to create a sturdy, crispy crust, select plain corn flakes without added flavors
- Grated parmesan cheese: for sharp, nutty richness, freshly grated cheese makes the biggest difference
- Dry ranch dressing mix: offers that bold tang and herb flavor, pick your favorite brand or blend your own for customization
- Fresh parsley: finely chopped for garnish to add a fresh, vibrant touch
Step-by-Step Instructions
- Prepare your workspace:
- Preheat the oven to 400 degrees Fahrenheit. Line a baking sheet with parchment paper or aluminum foil then spray lightly with cooking spray to prevent sticking.
- Prep the chicken:
- Pat chicken tenderloins dry with paper towels. If some pieces are uneven in thickness, gently pound them with a meat mallet to create uniform thickness. This ensures even cooking and juicy tenders.
- Set up your coating station:
- Arrange three shallow bowls or plates. Place melted butter in the first bowl. Crush corn flakes into fine crumbs using your hands or a rolling pin in the second bowl. In the third bowl, combine the crushed corn flakes, parmesan cheese, and dry ranch dressing mix.
- Coat the tenders:
- Dip each chicken tender into the melted butter and flip to coat all sides fully. Press the buttered tender into the corn flake mixture over and over to cover completely and help the coating adhere.
- Arrange on baking sheet:
- Place the coated tenders on the prepared baking sheet spaced slightly apart. This provides room for the hot air to circulate and keeps them crispy.
- Add extra crispiness:
- Lightly spray the tops of the tenders with cooking spray. This little step makes all the difference in creating that golden crust.
- Bake:
- Bake in the oven for 18 to 20 minutes, flipping the tenders halfway through to cook evenly. They are done when the coating is golden brown and the internal temperature reaches 165 degrees Fahrenheit.
- Rest and garnish:
- Remove the tenders from the oven and let them rest for about 3 to 5 minutes to retain juiciness. Sprinkle with fresh chopped parsley before serving.
 Save Pin
Parmesan cheese is my favorite ingredient here. It adds a depth of savory flavor that pairs perfectly with the ranch seasoning and elevates the whole dish. One memory I cherish is making these for a casual family party and watching the plate empty before the sauce even arrived. Everyone loved them.
Storage Tips
Store leftovers in an airtight container in the refrigerator for up to four days. Reheat in the oven at 375 degrees Fahrenheit for about 8 to 10 minutes or in an air fryer for 5 to 6 minutes to restore the crispiness. Avoid the microwave, as it softens the coating.
Freeze uncooked breaded tenders on a baking sheet until firm, then transfer to a freezer bag. Freeze up to two months. Bake from frozen and add 5 to 7 minutes to the baking time.
Ingredient Substitutions
You can swap corn flakes for panko breadcrumbs or crushed Rice Krispies for a different texture profile. For the cheese, sharp cheddar or asiago works well instead of parmesan. To add spice, stir in some cayenne pepper or garlic powder into the coating mix. Use gluten-free corn flakes and ranch mix if needed.
Serving Suggestions
Serve these tenders with an array of dipping sauces like ranch, honey mustard, barbecue, or buffalo sauce. They pair wonderfully with mashed potatoes, roasted vegetables, salads, or inside wraps and sandwiches. They also shine as party appetizers on a platter with toothpicks.
Pro Tips
- Crush the corn flakes finely for better adhesion and even coating
- Don’t skip the melted butter step, it is key to flavor and sticking power
- Use a wire rack on the baking sheet for air circulation and crispier tenders
Commonly Asked Questions
- → Can I substitute chicken breasts for tenderloins?
Yes, slicing chicken breasts into similar-sized strips works well, but adjust cooking time to ensure thorough cooking.
- → How do I keep the coating crispy after baking?
Lightly spray the tops with cooking oil before baking and avoid overcrowding the pan so each piece crisps evenly.
- → What can I use instead of corn flakes for the coating?
Crushed panko breadcrumbs, Rice Krispies, or crushed crackers offer alternative textures and work nicely.
- → How can I tell when the chicken is fully cooked?
Use a meat thermometer and ensure the internal temperature reaches 165°F in the thickest part.
- → Is it possible to cook these in an air fryer?
Yes, air fry at 400°F for 10-12 minutes, flipping halfway through, until coating is golden and the meat is cooked through.
- → Can these be prepared ahead of time?
Coat the chicken and refrigerate up to 4 hours before baking for convenient meal prep.