
 Save Pin
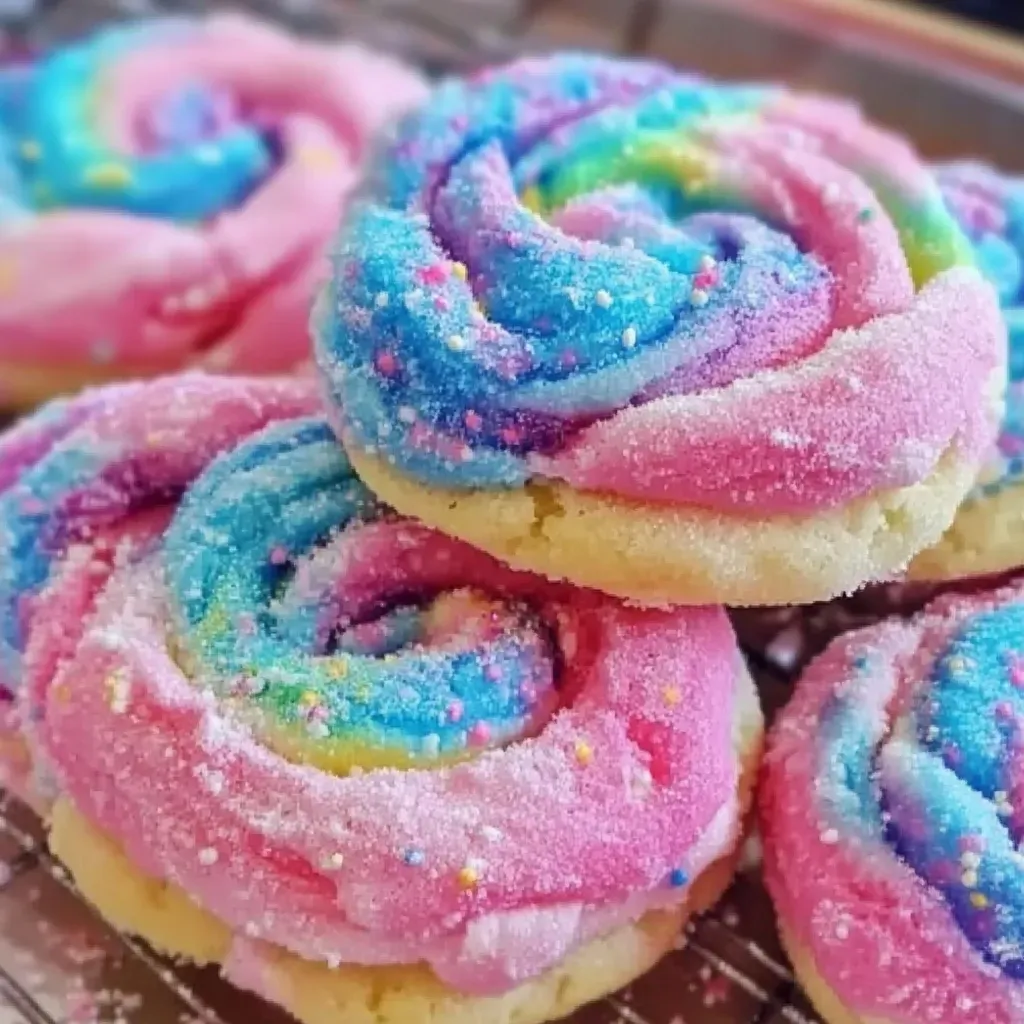
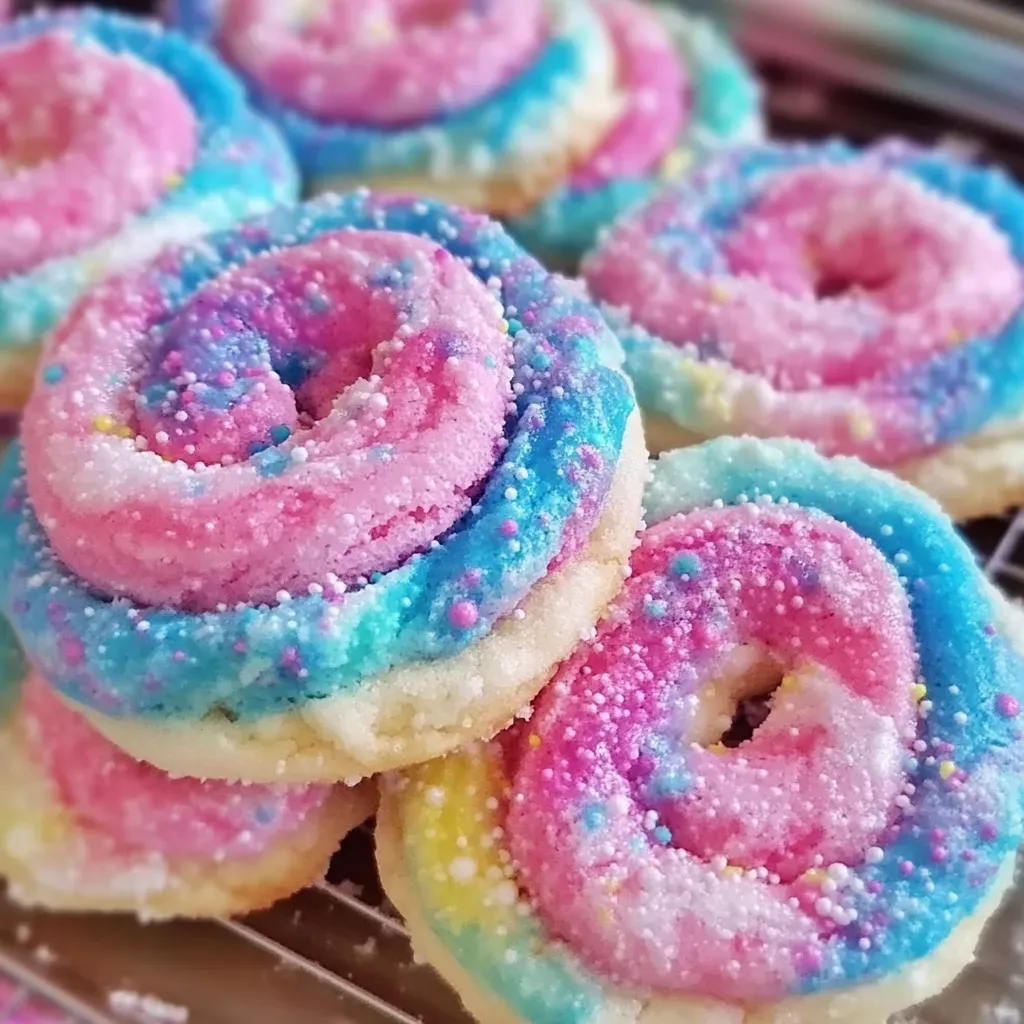
This cookie recipe brings the nostalgic magic of cotton candy to your kitchen with its delightful swirls of pink and blue. The soft, fluffy cookies capture that carnival feeling while maintaining a perfectly chewy texture. I developed this recipe after taking my nieces to a summer fair where they couldn't get enough of the cotton candy stands.
These cookies have become my signature treat for children's birthday parties. The first time I made them, everyone thought I had bought them from a specialty bakery. Now they're requested for every family gathering.
Ingredients
- Flour gives these cookies their structure while keeping them tender
- Sugar provides sweetness and helps create those crisp edges
- Baking powder and baking soda work together for the perfect rise
- Salt balances the sweetness and enhances all flavors
- Butter adds richness and that irresistible cookie flavor
- Buttermilk creates tenderness and a subtle tang
- Egg binds everything together and adds moisture
- Vanilla extract provides depth and warmth
- Gel food coloring creates vibrant colors without changing texture
- Optional cotton candy flavoring boosts the nostalgic carnival taste
Step-by-Step Instructions
- Prepare Your Oven and Pan
- Heat your oven to 175°C conventional heat. Line your baking sheet with parchment paper for easy release. This preparation ensures your cookies will bake evenly and not stick.
- Mix Dry Ingredients
- Combine flour, baking powder, baking soda, and salt in a medium bowl. Whisking these together ensures even distribution of leavening agents for consistent texture throughout your cookies.
- Cream Butter and Sugar
- Beat butter and sugar with an electric mixer for 2-3 minutes until light and fluffy. This step incorporates air into the mixture which gives the cookies their soft texture. Do not rush this step as proper creaming is crucial for the right consistency.
- Add Wet Ingredients
- Incorporate egg, vanilla extract and buttermilk into your butter mixture, beating until well combined. The mixture might look slightly curdled but this is normal and will smooth out when you add the dry ingredients.
- Incorporate Dry Ingredients
- Gradually add the flour mixture to the wet ingredients, mixing just until combined. Overmixing at this stage can develop gluten and result in tough cookies, so stop mixing as soon as no dry streaks remain.
- Color the Dough
- Divide dough in half and color one portion pink and the other blue using gel food coloring. Gel colors are preferred as they provide vibrant color without adding excess moisture that could alter your dough consistency.
- Form and Shape Cookies
- Take small portions of each colored dough, gently twist them together without overmixing, and form into balls. Place them on the baking sheet with about 5cm between each cookie to allow for spreading.
- Bake to Perfection
- Bake for 10-12 minutes until the edges are just starting to turn golden. The centers should still appear slightly soft as they will continue cooking from residual heat after removal from the oven.
 Save Pin
The gel food coloring is my secret weapon in this recipe. I once tried making these with liquid food coloring and ended up with a strange purple mess that tasted fine but looked nothing like the cotton candy inspiration. The gel colors maintain their vibrancy through baking and create that perfect swirled effect.
Storing Your Cotton Candy Cookies
These cookies stay fresh for up to 5 days when stored in an airtight container at room temperature. The key is making sure they're completely cooled before storing them. For longer storage, you can freeze the baked cookies for up to 3 months. I prefer freezing the unbaked dough balls and baking them fresh whenever a craving hits. Simply add 1-2 minutes to the baking time when cooking from frozen.
Fun Color Variations
While the classic pink and blue combination perfectly captures cotton candy vibes, you can easily adapt this recipe for any occasion. Try red and green for Christmas, orange and black for Halloween, or your child's favorite colors for their birthday. The technique remains the same regardless of which colors you choose. Just remember that a little gel coloring goes a long way, so start with small amounts and build up to your desired intensity.
Perfect Pairings
Serve these whimsical cookies with vanilla ice cream for an elevated dessert experience. The cool creaminess complements the soft, sweet cookies beautifully. For an extra special treat, sandwich two cookies with a scoop of ice cream between them. These cookies also pair wonderfully with a cold glass of milk for kids or a hot cup of tea for adults seeking a sweet nostalgic moment.
 Save Pin
Commonly Asked Questions
- → Wie bekomme ich die perfekte Farbwirbelung bei den Cotton Candy Keksen?
Für den perfekten Farbwirbel solltest du die beiden gefärbten Teige nur leicht miteinander verdrehen, nicht zu stark kneten. Nimm einfach einen kleinen Klecks von jedem Farbteig, lege sie nebeneinander und forme daraus eine Kugel mit minimaler Vermischung. So bleiben die Rosa- und Blautöne klar definiert, anstatt zu Lila zu verschwimmen.
- → Kann ich die Kekse auch ohne Zuckerwatte-Aroma zubereiten?
Absolut! Das Zuckerwatte-Aroma ist als optionale Zutat angegeben und verleiht den Keksen lediglich einen zusätzlichen nostalgischen Geschmack. Auch ohne dieses spezielle Aroma werden die Kekse durch ihre bunte Optik und den süßen Grundteig zu einem Hingucker und schmecken herrlich.
- → Warum ist mein Teig zu weich zum Formen?
Wenn dein Teig zu weich zum Formen ist, stelle ihn einfach für 20-30 Minuten in den Kühlschrank. Die Butter im Teig wird dadurch fester, und der Teig lässt sich besser handhaben. Achte aber darauf, ihn nicht zu lange zu kühlen, da er sonst zu fest wird und die Farbwirbel schwieriger zu erzeugen sind.
- → Welche Lebensmittelfarbe eignet sich am besten für diese Kekse?
Für die intensivsten und schönsten Farben solltest du Gel-Lebensmittelfarben verwenden. Diese sind konzentrierter als flüssige Farben und verändern die Konsistenz des Teiges kaum. Flüssige Lebensmittelfarben könnten den Teig zu weich machen und liefern oft weniger leuchtende Ergebnisse.
- → Wie lange bleiben die Cotton Candy Kekse frisch?
In einem luftdicht verschlossenen Behälter bei Raumtemperatur bleiben die Kekse etwa 4-5 Tage frisch und weich. Du kannst sie auch einfrieren – dafür die vollständig abgekühlten Kekse in einem gefriersicheren Behälter oder Beutel bis zu 3 Monate aufbewahren und vor dem Servieren bei Raumtemperatur auftauen lassen.
- → Woran erkenne ich, dass die Kekse fertig gebacken sind?
Die Kekse sind perfekt, wenn die Ränder gerade beginnen, leicht goldbraun zu werden, während die Mitte noch weich erscheint. Überbache sie nicht! Sie festigen sich beim Abkühlen noch etwas. Nach dem Backen solltest du sie zunächst 2-3 Minuten auf dem Blech lassen, bevor du sie zum vollständigen Auskühlen auf ein Gitter legst.