 Save Pin
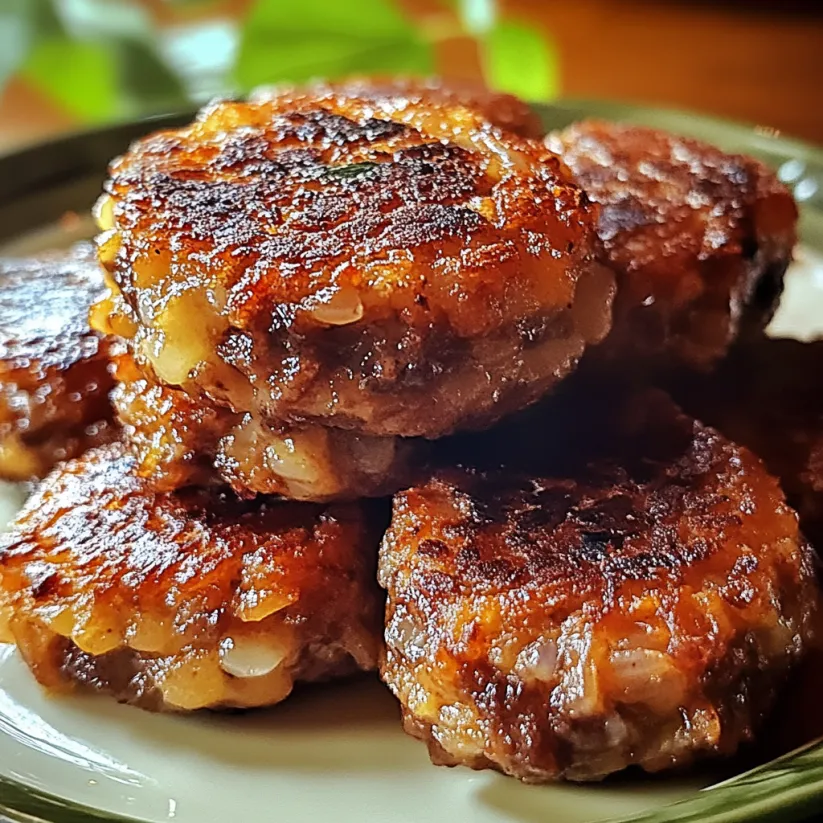
These Classic Beef Rissoles deliver pure comfort with every bite and bring back memories of hearty family dinners. With a juicy beef center, crispy edges, and a subtle kick from herbs and spices, this is the kind of main dish I turn to when I want something easy but deeply satisfying. You will love how quickly these come together and how versatile they are for weeknight meals or casual gatherings.
The first time I made these, my kids came running from their bedrooms just from the smell alone. Now they cheer every time rissoles are on the menu and we never have leftovers.
Ingredients
- Ground beef: provides the hearty base and brings rich flavor so use fresh beef from your local butcher or market for best results
- Small onion: finely chopped for a gentle sweetness and aromatic flavor look for a firm and shiny onion
- Garlic: minced to add depth and a subtle kick use fresh garlic cloves rather than jarred
- Breadcrumbs or panko: help bind the mixture and keep rissoles light opt for panko if you like extra crunch
- Egg: lightly beaten so everything holds together choose fresh and room temperature if possible
- Ketchup or tomato sauce: brings a slight tang and sweetness use your favorite brand for a flavor you love
- Worcestershire sauce: adds a savory umami boost find one without artificial ingredients for best taste
- Dried or fresh parsley: brings color and freshness freshly chopped tastes especially bright
- Smoked paprika: deepens the flavor a little goes a long way so choose high quality for real impact
- Salt and black pepper: to season use kosher salt and freshly ground pepper
- Olive oil or vegetable oil: for frying to create a crisp golden crust choose a neutral oil if you want the beef flavors to shine
Step-by-Step Instructions
- Prepare the Mixture:
- In a large bowl combine ground beef chopped onion minced garlic breadcrumbs egg ketchup Worcestershire sauce parsley smoked paprika salt and black pepper using your hands or a spoon Mix gently until just combined This helps keep the mixture tender and rissoles juicy
- Shape the Rissoles:
- Divide the mixture into even portions This usually makes eight to ten pieces Shape each into a patty about three inches wide and half an inch thick with smooth edges Press just enough to form a shape without making them dense
- Cook the Rissoles:
- Heat oil in a large skillet over medium heat Carefully add the rissoles so they have space to brown evenly Cook for four to five minutes on the first side until deep golden and slightly crisp Flip and cook another four to five minutes on the other side until cooked through The internal temperature should reach seventy one degrees Celsius
- Serve Warm:
- Transfer the rissoles to a plate lined with paper towels to catch any extra oil Serve immediately with your favorite sides I love them with buttery mashed potatoes or a fresh salad for balance
 Save Pin
When I was little my mum always snuck a handful of grated carrot into the mixture which made the rissoles extra juicy and secretly nutritious My kids now request double the garlic and consider it the secret ingredient
Storage Tips
Store any leftover rissoles in an airtight container in the fridge for up to three days They reheat well in the oven at one hundred eighty degrees Celsius for about ten minutes or until hot all the way through For longer storage freeze raw or cooked rissoles in a single layer then transfer to a freezer safe bag and keep for up to two months
Ingredient Substitutions
You can swap ground beef for ground turkey or chicken for a lighter version Gluten free breadcrumbs work well for those with dietary needs Fresh parsley can always be replaced with dried if that is what you have on hand and regular paprika can sub in if you do not have smoked
Serving Suggestions
Pair your rissoles with buttery mashed potatoes for classic comfort Serve with steamed green beans or peas for a quick veggie side For a summer option try them sliced in a fresh roll with crisp lettuce and your favorite sauce
 Save Pin
Cultural Note
Rissoles have deep roots in Australian home cooking and are a cozy weeknight staple for many families Simple ingredients and easy steps mean every household has their special twist and I love how every cook adds a tiny secret to make it their own
Commonly Asked Questions
- → What makes rissoles juicy and tender?
Adding breadcrumbs, egg, and shredded vegetables like carrot or zucchini helps lock in moisture and keep the beef patties tender.
- → Is it possible to freeze the rissoles before cooking?
Yes, shape the rissoles and freeze them raw on a tray. Once solid, transfer to a freezer-safe bag and cook directly from frozen with extra cooking time.
- → What are the best sides to serve with beef rissoles?
Popular options include creamy mashed potatoes, steamed veggies, fresh green salads, or even a rich gravy for dipping.
- → Can I use fresh parsley instead of dried?
Absolutely; fresh parsley adds vibrant flavor. Use two tablespoons of chopped fresh in place of one teaspoon dried.
- → How do I know the rissoles are cooked through?
Rissoles are done when the outside is golden brown and an internal temperature of 160°F (71°C) is reached.
