
 Save Pin
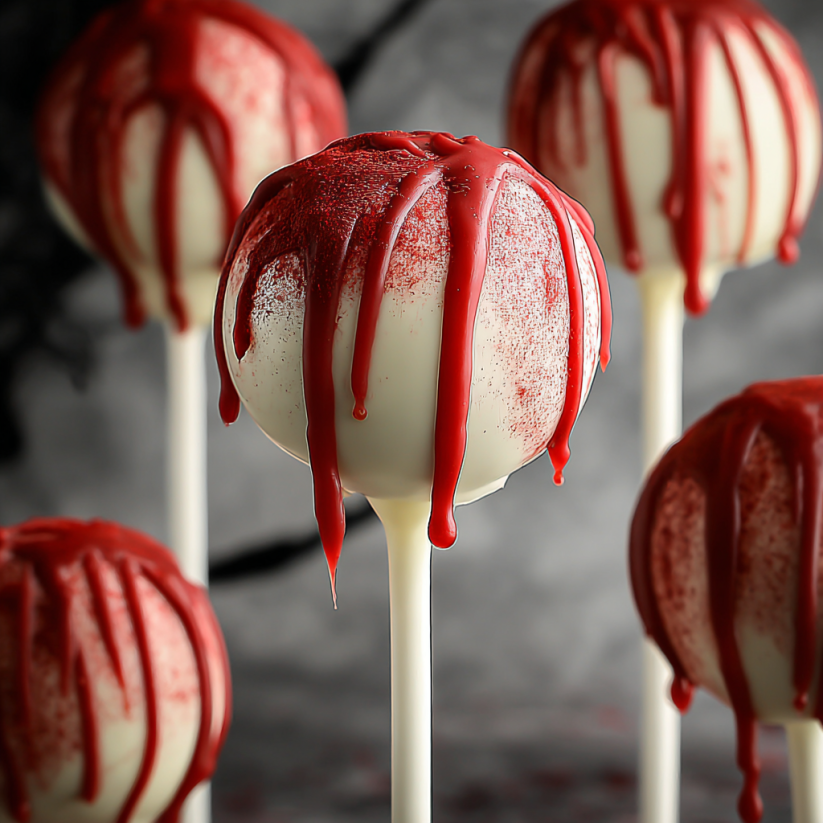
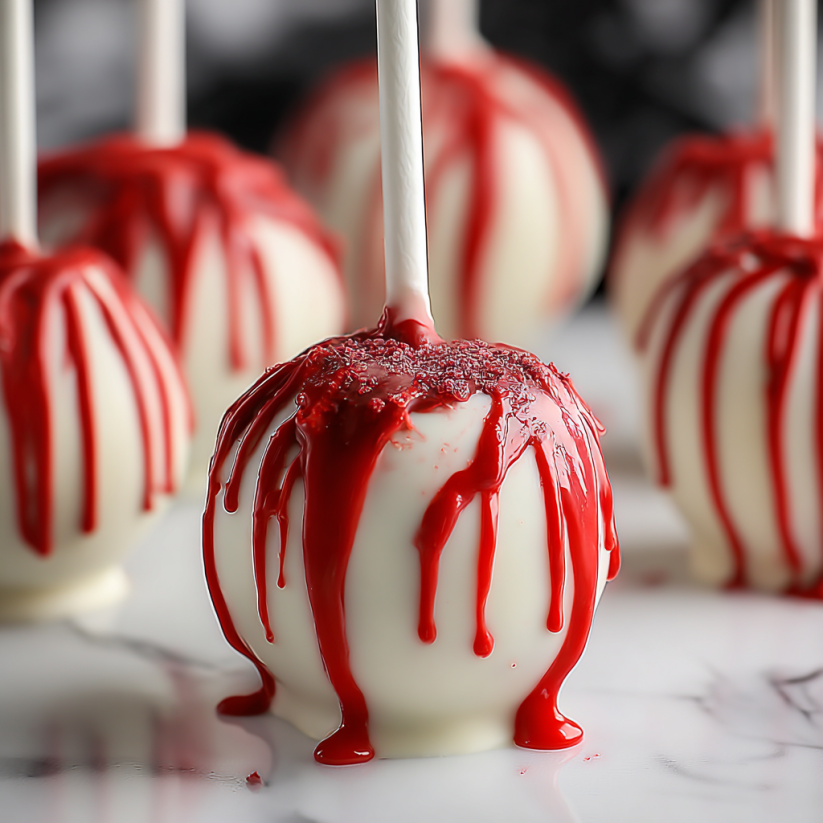
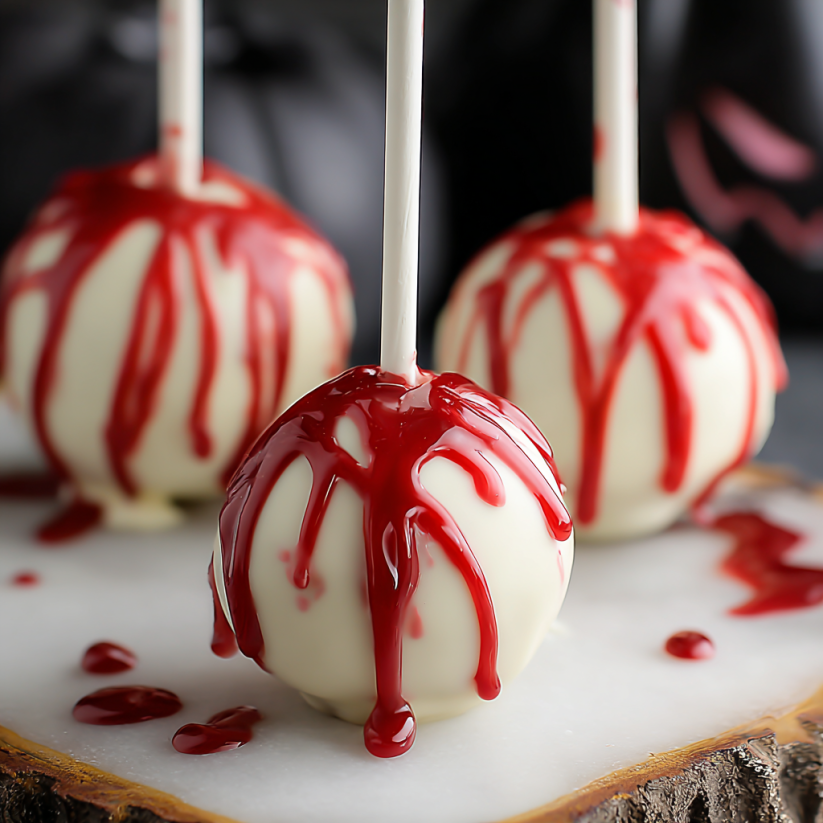
These Vampire Bite Cake Pops are a showstopper for any Halloween party or spooky celebration. With their soft vanilla cake center, silky white chocolate coating, and dramatic red icing drip, they are as eye-catching as they are delicious. Whenever I make a batch, there is always a crowd gathered to see who will dare to take the first bite.
I made these for a Halloween sleepover one year and the kids squealed with delight before they even tasted them. Now, my sister insists I make them every October.
Ingredients
- Vanilla cake mix: Opt for a moist, fluffy brand and prepare according to box directions for best texture
- Vanilla frosting: Choose a smooth, creamy option Avoid ones with whipped or light textures so the cake balls hold together well
- White chocolate melts: Use high-quality candy melts for a smooth finish Check specialty stores for bright white options
- Red gel icing: Look for one with a deep hue and easy-squeeze bottle This makes drizzling precise and dramatic
- Cake pop sticks or sturdy lollipop sticks: Make sure they are food-safe and sturdy enough for dipping
Step-by-Step Instructions
- Bake and Cool Cake:
- Bake your vanilla cake following the box instructions Allow to cool fully before the next step This prevents excess moisture
- Crumble Cake:
- Break the cooled cake into fine crumbs using your hands or a fork Work gently so you do not compact the crumbs
- Mix with Frosting:
- Add the vanilla frosting to the crumb mixture Mix thoroughly until the mixture stays together when pressed
- Shape Balls:
- Scoop out small portions and roll them into 1 inch balls Arrange on a parchment lined baking sheet for easy removal
- Freeze:
- Place the baking sheet in the freezer for about 1 hour until the cake balls are firm This helps them hold when dipped
- Melt Chocolate:
- In a microwave safe bowl heat the white chocolate melts in 30 second bursts Stir often until smooth and fully melted
- Attach Sticks:
- Dip each cake pop stick into the melted white chocolate Push the stick about halfway into the center of each cake ball This anchors the stick after chilling for a few seconds
- Coat with Chocolate:
- Fully submerge each cake pop into the melted white chocolate Coat evenly and let any extra chocolate drip off Stand them upright to set using a block of foam or a cup
- Decorate:
- Using the red gel icing create the look of dripping blood Let the icing set completely before serving or packaging
 Save Pin
When I started making these cake pops my favorite part was always adding the blood effect The more dramatic the drips the more excited everyone gets It turns a simple treat into a conversation starter at any gathering
Storage Tips
Store cake pops in an airtight container lined with wax paper so they do not stick together If storing for more than a day keep them in the refrigerator They can be made up to three days ahead just wait to drizzle the blood icing until closer to serving time for the freshest look
Ingredient Substitutions
You can use homemade cake and buttercream if you prefer Check that the cake is not too moist or oily as this can make rolling difficult For a gluten free version use a gluten free cake mix and ensure your chocolate and icing are gluten safe Switch up the food coloring for a gory green or purple effect
 Save Pin
Serving Suggestions
These pops are great standing upright in a foam board covered with themed decorations Or lay them flat on a spooky tray lined with candy corn Add a few bats or plastic vampire teeth for playful serving touches They are just right for trick or treat tables or a monster movie marathon
Cultural Context
Cake pops first gained popularity in the early 2010s thanks to creative bakers sharing on social media Their popularity soared due to easy customization and dramatic visual appeal This vampire bite version taps into classic Halloween imagery and playful nostalgia reminding many people of childhood treats and holiday crafts
Commonly Asked Questions
- → How do I keep cake pops from falling off the sticks?
Dip the sticks in melted chocolate before inserting into cake balls. This helps secure them for easy dipping and handling.
- → Can I use homemade cake instead of box mix?
Yes, any vanilla cake can be used. Make sure the cake is completely cooled before crumbling and mixing with frosting.
- → What type of white chocolate works best?
Candy melts or high-quality white chocolate chips create a smooth coating that sets firmly around the cake pops.
- → How can I get a realistic 'bloody' look with the icing?
Use red gel icing or colored white chocolate and drizzle over the pops in irregular lines for a dramatic, drippy effect.
- → How should I store cake pops after making them?
Let pops set completely, then store in an airtight container in the fridge for up to 5 days to maintain freshness.