
 Save Pin
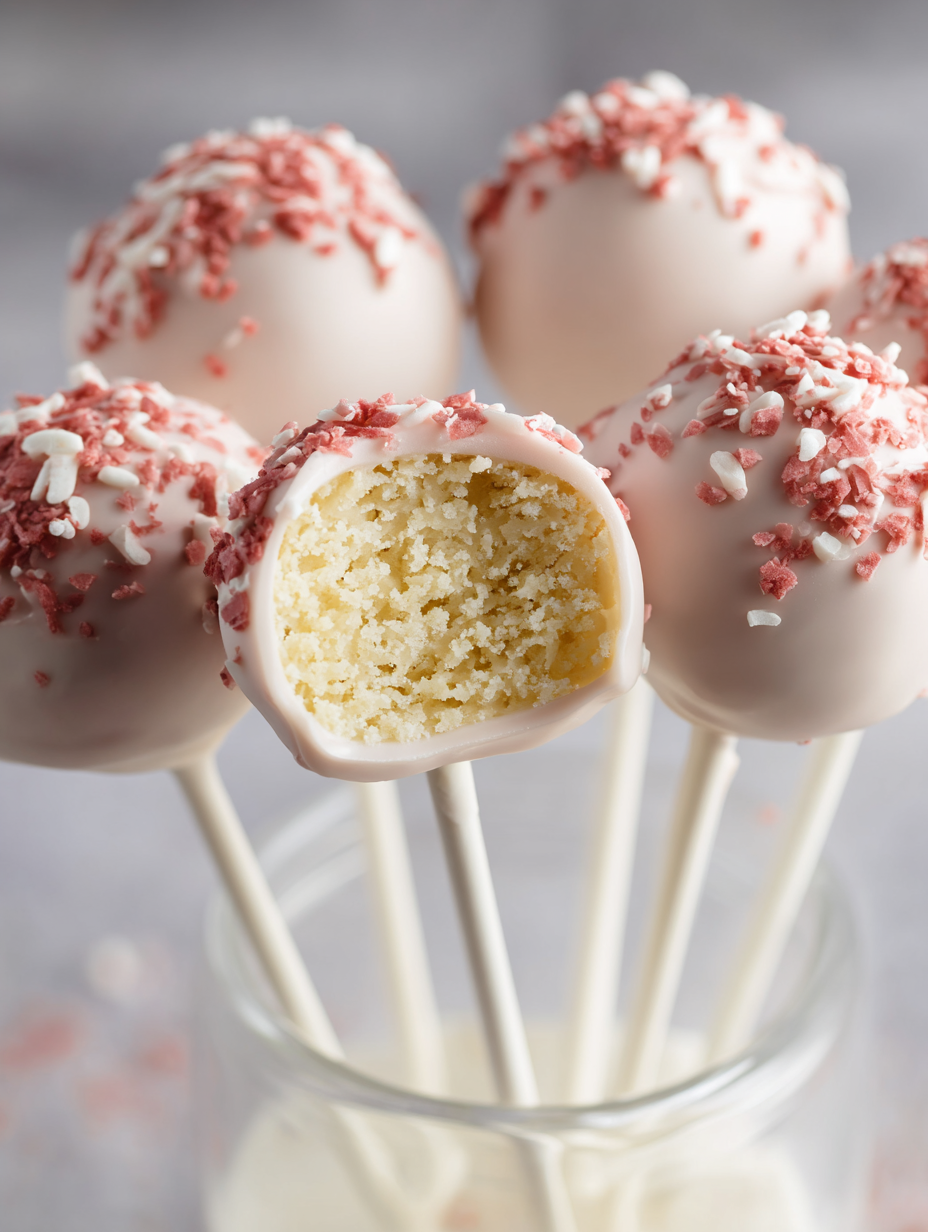
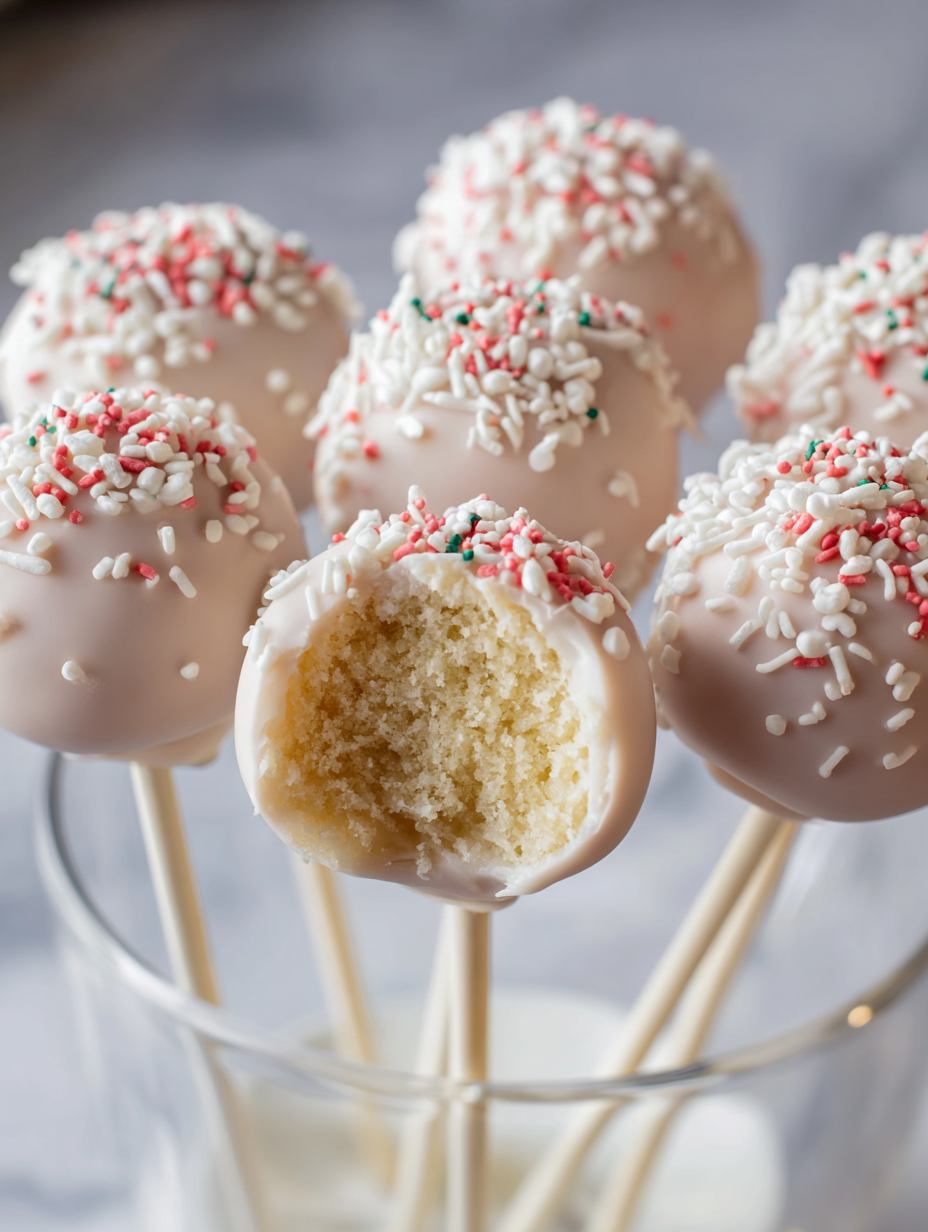
These copycat Starbucks cake pops bring the café experience right into your kitchen with less fuss and cost. Crunchy chocolate on the outside and a moist, creamy cake center make each bite a perfect treat. Their pretty pink color and nutty flavor make them a charming dessert for any occasion.
I first made these when craving something sweet but didn’t want to spend on expensive store-bought treats. Now, my family asks for them at parties and just for a cozy afternoon snack.
Ingredients
- White cake mix: provides a fluffy, neutral-flavored base, select a trusted brand for best texture
- Vanilla frosting: binds the crumbled cake and adds richness, cream cheese or buttercream work well too
- White almond bark: melts smoothly for a glossy coating, you can substitute with candy melts or quality melting wafers
- Vegetable oil: thins the melted almond bark and gives it a beautiful shine, avoid butter as it alters the coating’s consistency
- Red gel food coloring: tints the coating a pastel pink, gel is essential to prevent the chocolate from seizing
- Sprinkles: add a fun and festive finishing touch, choose jams or shapes matching your occasion
Step-by-Step Instructions
- Make and Bake the Cake:
- Prepare the white cake mix according to package instructions. Once baked, allow it to cool completely to room temperature to prevent frosting from melting in the next step.
- Crumble the Cake and Add Frosting:
- Using your hands, break the cake into fine crumbs resembling breadcrumbs. Trim off any hard or crispy edges beforehand. Gradually add vanilla frosting, mixing gently until the crumbs hold together but remain rollable. The mixture should not be sticky or overly mushy.
- Form Cake Balls:
- Use a mini scoop or your hands to roll the mixture into bite-sized balls approximately one inch in diameter. Chill the balls in the freezer for at least one hour to firm them up, which is crucial for preventing them from falling apart later.
- Attach Cake Balls to Sticks:
- Dip the tip of a cake pop stick into melted chocolate, then insert it about halfway into a chilled cake ball. Place them back into the freezer or fridge for ten minutes to let the coating set and secure the pops on the sticks.
- Dip Cake Pops in Melted Chocolate:
- Melt the white almond bark with vegetable oil until smooth, stirring in red gel food coloring for a pink hue. Slowly dip each cake ball into the coating, ensuring full coverage. Gently tap off excess chocolate to prevent drips.
- Decorate and Set:
- Sprinkle your desired decorations immediately after dipping while the coating is still wet. Stand the cake pops upright in a foam block or similar to allow the chocolate to fully harden.
 Save Pin
My favorite ingredient is the almond bark. It melts beautifully and offers the perfect crunch without overpowering the cake. One holiday season, I made a batch with red and green coatings filled with Christmas sprinkles, and they were the hit of the party, especially with kids who loved choosing their favorite colors.
Storage Tips
Store the finished cake pops in an airtight container in the refrigerator for up to five days. To enjoy optimal flavor and texture, bring them to room temperature about an hour before serving so the cake can soften and the coating won't be too firm. Avoid keeping them out on the counter for long to prevent spoilage.
Ingredient Substitutions
For the cake base, any boxed cake mix works, including funfetti or chocolate, if you prefer a different flavor. Use cream cheese frosting for a tangy twist or chocolate frosting for a richer taste. Swap white almond bark for milk or dark chocolate melts if you like a different coating, just add vegetable oil as needed for smoothness. If you cannot find gel food coloring, powdered coloring can be mixed carefully, but avoid liquid as it can affect the chocolate's texture.
Serving Suggestions
Serve these cake pops at parties as easy grab-and-go desserts, or make them for afternoon tea paired with coffee or milk. They also make adorable gifts—wrap a few in cellophane tied with ribbon for a sweet homemade treat. For kids' birthdays, match the coating colors and sprinkles to the party theme for an extra personalized touch.
Pro Tips
- Always chill the cake balls thoroughly before dipping to prevent them from falling apart in the chocolate.
- Do not overheat the coating; melt in short intervals and stir gently to keep it smooth and workable.
- Dip only a few cake pops at a time to avoid having the coating harden before you finish decorating.
Commonly Asked Questions
- → What type of cake mix is best for these pops?
A plain white boxed cake mix works wonderfully, but homemade or leftover cake can also be used for flexibility and flavor variety.
- → How do you ensure the cake balls hold their shape?
Gently crumble cooled cake and add frosting gradually until the mixture is moist yet firm enough to roll. Chilling the balls before dipping is essential.
- → What keeps the cake pops attached to the sticks?
Dipping the stick tip in melted chocolate before inserting it into the cake ball helps secure the pop firmly during coating.
- → Can I customize the color of the coating?
Yes, adding gel food coloring to melted almond bark or candy melts allows you to create pastel or vibrant coatings without affecting texture.
- → How should cake pops be stored and served?
Store them chilled in an airtight container for up to 5 days and bring to room temperature about an hour before serving for the best taste and texture.
- → Can cake pops be frozen?
Uncoated cake balls freeze best for up to 2 months. Thaw at room temperature before enjoying; coated pops may lose their glossy finish in the freezer.