
 Save Pin
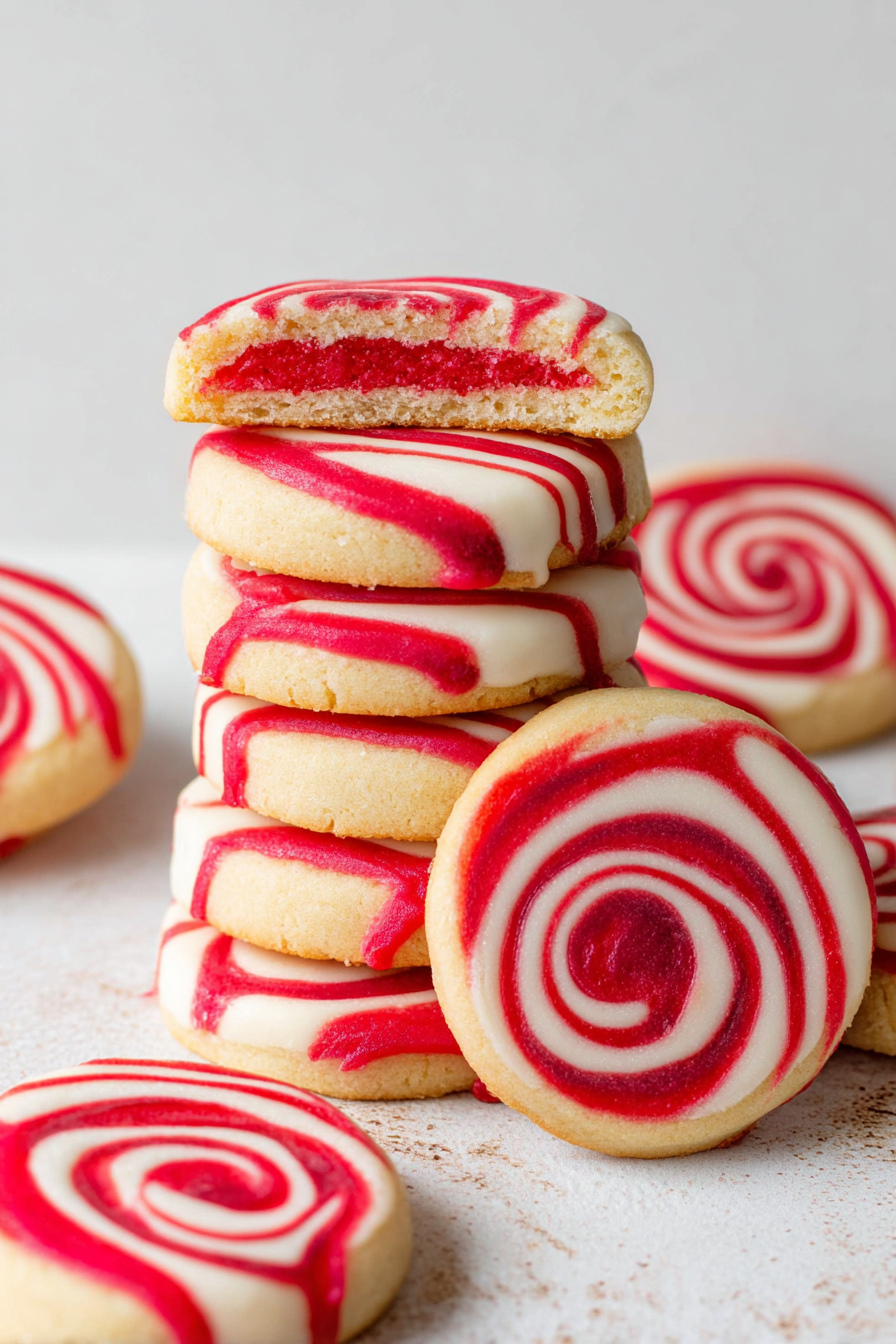
Old fashioned Christmas Pinwheel Cookies are a standout on any holiday cookie tray with their festive red and white spirals and classic sugar cookie flavor. This recipe yields a batch of soft, buttery cookies that are not only delicious but also eye catching making them perfect for sharing at holiday gatherings or leaving out for Santa. Whether you are keeping up family baking traditions or starting new ones these cookies are a guaranteed crowd pleaser.
Every time I bake these the kitchen smells like Christmas and my kids love helping roll the dough into perfect spirals. Making them is just as fun as eating them and they never last long on the cookie plate.
Ingredients
- All purpose flour: ensures a sturdy but tender cookie base look for a brand with a fine texture
- Baking powder: gives the cookies just the right lift choose fresh powder for best results
- Salt: balances sweetness and enhances all flavors a fine sea salt works beautifully
- Unsalted butter: creates a rich flavor and soft texture use high quality butter and let it come to room temperature
- Granulated sugar: sweetens the cookies and helps them bake up golden choose superfine sugar for a smoother dough
- Egg: binds everything together and adds tenderness make sure it is at room temperature for easier mixing
- Vanilla extract: adds warmth go for pure vanilla for the richest flavor
- Red food coloring: gives the cookies their bright holiday swirl pick a concentrated gel color for vibrant results and even mixing
Step by Step Instructions
- Mix Dry Ingredients:
- In a medium bowl whisk together the flour baking powder and salt for at least thirty seconds to distribute the leavening evenly. Set this bowl aside.
- Cream the Butter:
- Place the softened butter and sugar in a large mixing bowl and beat with an electric mixer on medium speed for three to four minutes until the mixture is pale and fluffy. Add the room temperature egg and vanilla extract beat again until fully incorporated and creamy.
- Combine and Divide the Dough:
- With the mixer on low speed gradually add the dry ingredient mixture to the wet ingredients. Mix just until no streaks of flour remain and the dough comes together. Divide the dough in half using a kitchen scale for perfect evenness if desired.
- Color Half the Dough:
- Add red food coloring to one half of the dough. Knead the dough gently with a spatula or your hands until the color is completely even with no streaks. Adjust with more coloring as needed for the right brightness.
- Chill the Dough Disks:
- Press each half of the dough into a thick disk. Wrap separately in cling wrap and chill in the fridge for at least two hours and up to forty eight hours so the dough chills thoroughly.
- Roll and Stack the Dough:
- Roll each disk between two sheets of parchment paper into matching twelve inch squares about half an inch thick. Remove the top sheet from both doughs line up the red dough over the plain dough press lightly to stick them together.
- Roll into a Log:
- Carefully start rolling from one edge to form a tight log peeling away the parchment as you go. Aim to keep the spiral tight for a defined pinwheel look.
- Chill the Cookie Log:
- Wrap the finished log tightly in cling wrap and refrigerate for two more hours so the swirls become set and easy to slice.
- Preheat the Oven:
- About ten minutes before slicing the cookies preheat your oven to three hundred fifty degrees Fahrenheit and line two baking sheets with parchment paper.
- Slice the Cookies:
- Unwrap the chilled log and with a sharp serrated knife cut the log into half inch thick rounds. Rotate the log every few slices to prevent flattening.
- Bake the Cookies:
- Arrange the rounds two inches apart on prepared baking sheets. Bake for eight to ten minutes until the edges are just turning golden on the bottom.
- Cool Completely:
- Let the cookies cool on the baking sheet for five minutes then transfer to a cooling rack until completely cool before storing or serving.
 Save Pin
My favorite part of this recipe is the way the red swirl stays bright even after baking making every cookie feel special. Once when we made these together my daughter insisted on extra red food coloring and her batch turned out like candy cane wheels it is now a yearly tradition.
Storage Tips
Store cooled cookies in an airtight container at room temperature for up to one week. For longer storage freeze the baked cookies in a single layer then transfer to a container with layers of parchment in between. For best results freeze the unbaked cookie log well wrapped and slice and bake fresh each time you want cookies.
Ingredient Substitutions
Swap vanilla extract with peppermint or almond extract for a different holiday flavor. Use another food coloring shade such as green for a different look. If you are out of unsalted butter use salted butter just omit additional salt in the recipe. Gluten free all purpose flour blends work well in place of wheat flour for gluten free adaptations.
 Save Pin
Serving Suggestions
Pile these cookies high on a holiday platter alongside chocolate treats and other festive bakes. They look great with a dusting of powdered sugar or a ring of colored sprinkles pressed around the edges before baking. For an extra fun dessert sandwich a scoop of ice cream between two cookies.
Cultural and Historical Context
Pinwheel cookies have been popular since the mid twentieth century when vibrant colorful bakes became favored for holiday celebrations. Their playful appearance is inspired by classic childhood toys and the old fashioned technique of rolling layered doughs to create a spiral. They have since become a staple at Christmas for their cheerful design.
Commonly Asked Questions
- → How do I get even swirls in my pinwheel cookies?
Chilling the dough well and carefully rolling the two layers together keeps the spirals neat and uniform.
- → Can I use other colors instead of red?
Absolutely! Try green, blue, or a combination for different occasions or themed gatherings.
- → How should I store these cookies?
Store in an airtight container at room temperature for up to one week, or freeze for longer freshness.
- → Can I add extra flavors to the dough?
Yes, peppermint or almond extract can add a festive touch to the classic vanilla-flavored dough.
- → How thick should I slice the rolled dough?
For best results, slice each cookie about 1/2 inch thick to maintain their shape during baking.
- → Should the butter and egg be at room temperature?
Yes, letting both soften to room temperature helps make the dough smooth and easy to blend.