
 Save Pin
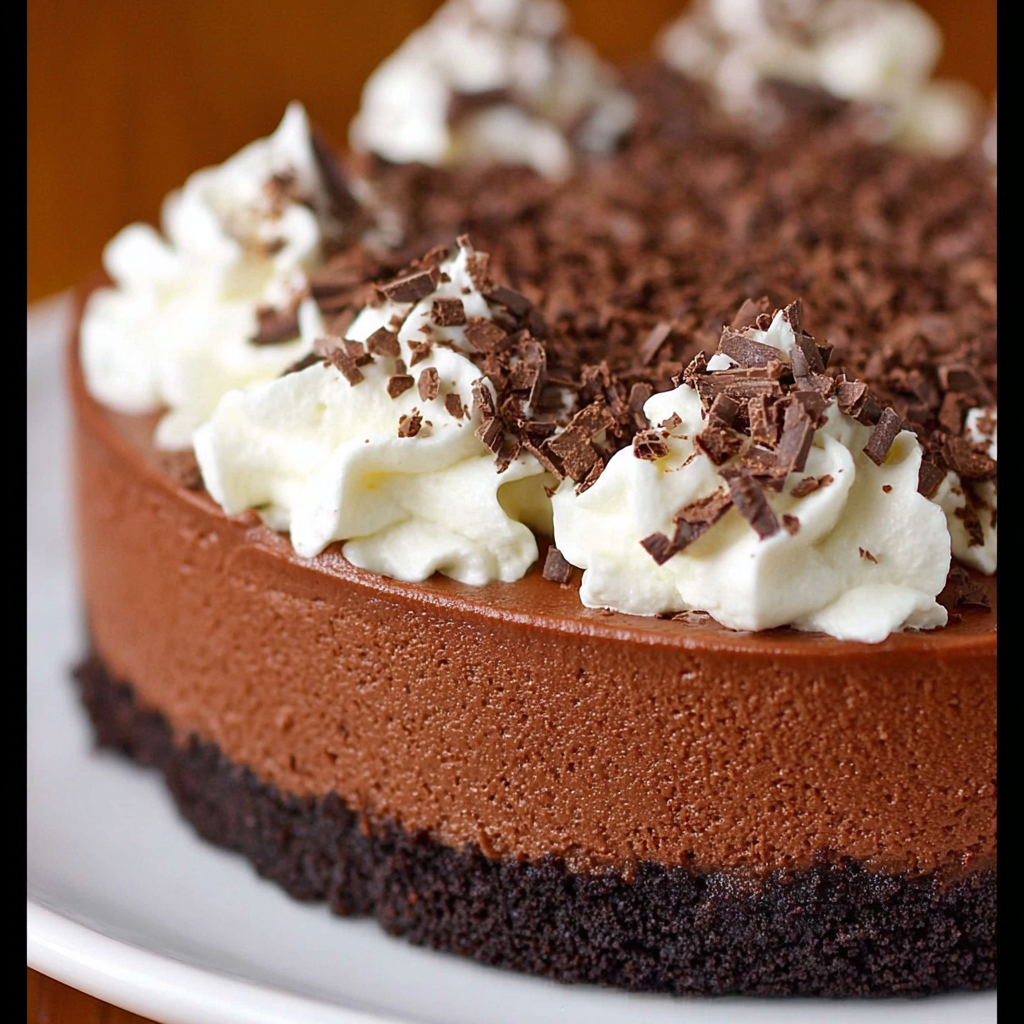
This no bake chocolate cheesecake is a delightful treat that combines rich chocolate flavor with a creamy, velvety texture. Perfect for those who want an impressive dessert without turning on the oven, it features a buttery chocolate cookie crust and a luscious cheesecake filling that sets beautifully in the fridge. Whether it’s a holiday celebration or an everyday indulgence, this cheesecake never fails to satisfy chocolate lovers.
Why You’ll Love This No Bake Chocolate Cheesecake
This recipe does not require an oven making it ideal for warm days or when you have little time to bake. The filling is ultra creamy with a mousse-like decadence that feels luxurious yet light. You can make it ahead of time which is a lifesaver for busy schedules. It’s easily customizable with toppings like whipped cream, berries, or chocolate shavings so you can change it up to your taste. Everyone from kids to adults will love the rich chocolate flavor and smooth texture. I first made this cheesecake for a family gathering and it quickly became an all-time favorite that people now request regularly.
Ingredients
- Chocolate cookie crumbs: They form the crunchy and bittersweet base of the crust. Choose cookies with a strong cocoa flavor for best results.
- Melted butter: Binds the cookie crumbs firmly to create a solid crust. Opt for unsalted butter to control salt levels.
- Cream cheese: The creamy heart of the cheesecake layer. Use full-fat cream cheese for richness and smoothness.
- Powdered sugar: Adds sweetness and helps create a silky texture. Sift it to avoid lumps.
- Semi-sweet chocolate: Melting this into the filling brings deep chocolate flavor. Pick quality chocolate with at least 60 percent cocoa for balance.
- Heavy cream: Whipped and folded in, it lightens the texture to a mousse-like consistency. Use cold cream for better whipping.
- Vanilla extract: Adds warmth and depth, enhancing all the flavors. Choose pure vanilla extract rather than imitation for best aroma.
Step-by-Step Instructions
- Make the Crust:
- Start by crushing chocolate cookies into fine crumbs using a food processor or by placing them in a zip-top bag and rolling them with a pin. Mix these crumbs with melted butter until fully combined. Press this mixture firmly into the bottom of a 9-inch springform pan to make an even and compact base. Place the crust in the refrigerator to chill while you prepare the filling.
- Prepare the Chocolate Base:
- Melt the semi-sweet chocolate gently using a double boiler or microwave in short bursts, stirring often to avoid burning. Allow the melted chocolate to cool slightly. In a large mixing bowl, beat the softened cream cheese with powdered sugar until completely smooth. Stir in the melted chocolate and vanilla extract until fully combined and beautifully glossy.
- Whip and Fold the Cream:
- In a clean, cold bowl whip the heavy cream until stiff peaks form to ensure a light texture. Gently fold the whipped cream into the chocolate mixture in small batches using a rubber spatula. Do this carefully to keep the airy texture intact without deflating the cream.
- Assemble and Chill:
- Spread the chocolate cheesecake filling evenly over the chilled crust and smooth the top using an offset spatula or the back of a spoon. Cover the pan loosely with plastic wrap or foil and refrigerate for at least six hours or overnight to allow the cheesecake to fully set and develop flavor.
- Serve and Garnish:
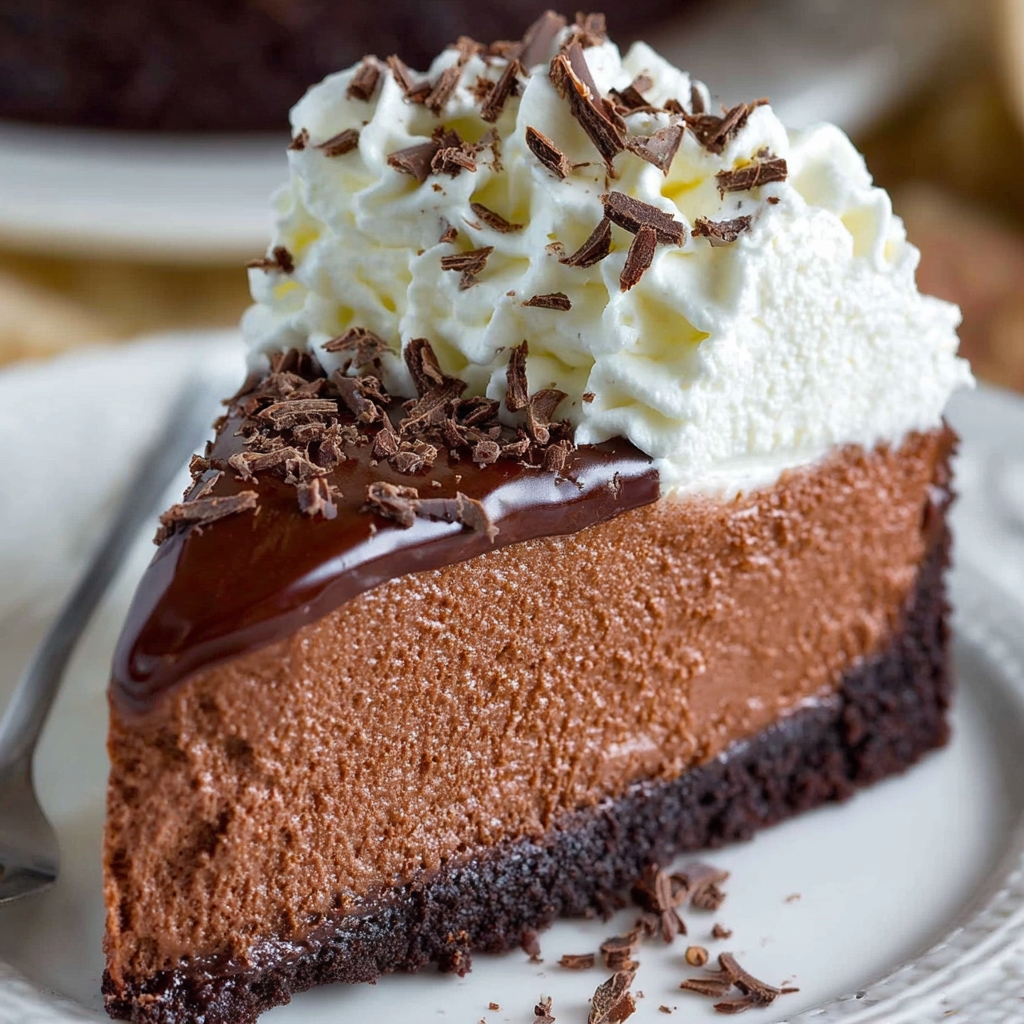
- Once set, carefully remove the cheesecake from the springform pan. Decorate with whipped cream, chocolate shavings, or fresh berries as you like. Slice with a sharp knife wiped clean between cuts for neat servings. Serve chilled to enjoy the best texture and richness.
 Save Pin
Storage Tips
Keep the cheesecake covered tightly in the fridge to preserve its moisture and texture. It lasts well for up to five days. For longer storage wrap individual slices in plastic wrap and foil then freeze. Thaw slices overnight in the refrigerator before serving for best results.
Ingredient Substitutions
You can substitute gluten-free chocolate cookies in the crust to make this dessert gluten-free without compromising flavor. For a sweeter cheesecake use milk chocolate instead of semi-sweet but remember the balance with cream cheese will be sweeter. Coconut cream can replace heavy cream for a dairy-free version, though the texture may be slightly different.
Serving Suggestions
Serve this cheesecake chilled with a generous dollop of whipped cream or fresh berries for color and brightness. Drizzle with chocolate ganache for an extra layer of chocolate indulgence. It also pairs beautifully with espresso or a glass of red wine to complete the experience.
Pro Tips
Make sure to use full-fat cream cheese for that rich and creamy texture do not substitute with low-fat versions. Always fold the whipped cream gently to keep the mousse-like lightness in the filling. Don’t skip chilling the cheesecake overnight it makes all the difference in texture and flavor.
Commonly Asked Questions
- → How long should the cheesecake chill to set properly?
Chilling for at least 6 hours is recommended, but overnight ensures the creamiest, firmest texture.
- → Can the cheesecake be frozen for later enjoyment?
Yes, wrap individual slices tightly with plastic and foil, freeze for up to a month, and thaw in the fridge before serving.
- → Is milk chocolate a suitable substitute?
You can use milk chocolate, but expect a sweeter, less balanced flavor compared to semi-sweet chocolate.
- → What’s the best method for crushing cookies for the crust?
A food processor creates fine, even crumbs; alternatively, a zip-top bag and rolling pin work well when pulsing manually.
- → Can the dessert be made gluten-free?
Definitely, by swapping standard chocolate cookies for gluten-free varieties, the crust remains delicious and firm.
- → How can I intensify the chocolate flavor?
Adding chocolate ganache drizzle or mixing mini chocolate chips into the filling enriches the chocolate depth admirably.