
 Save Pin
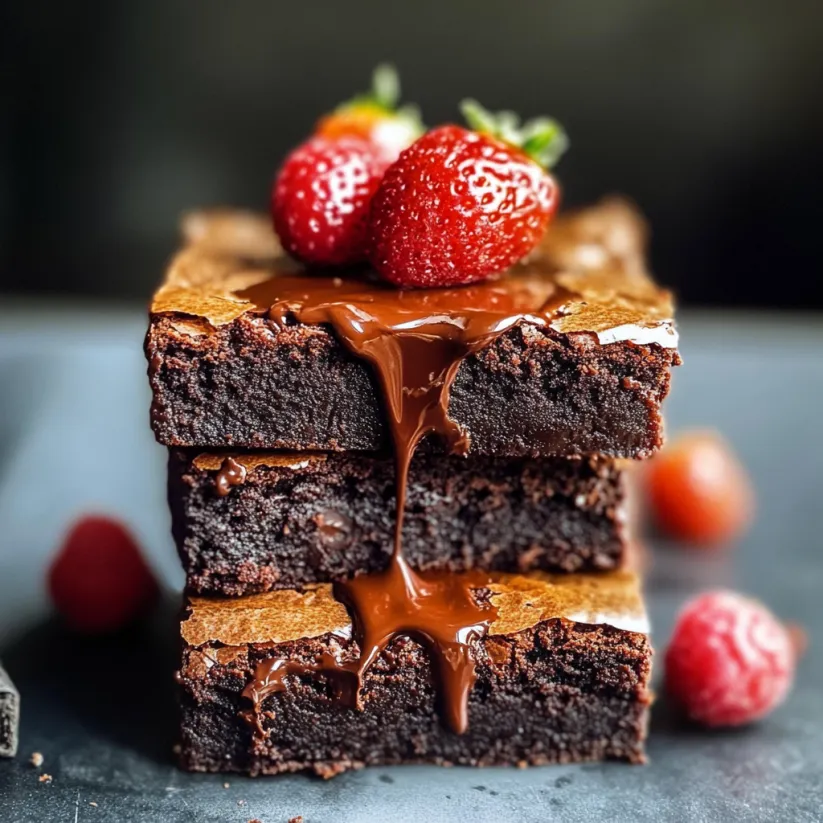
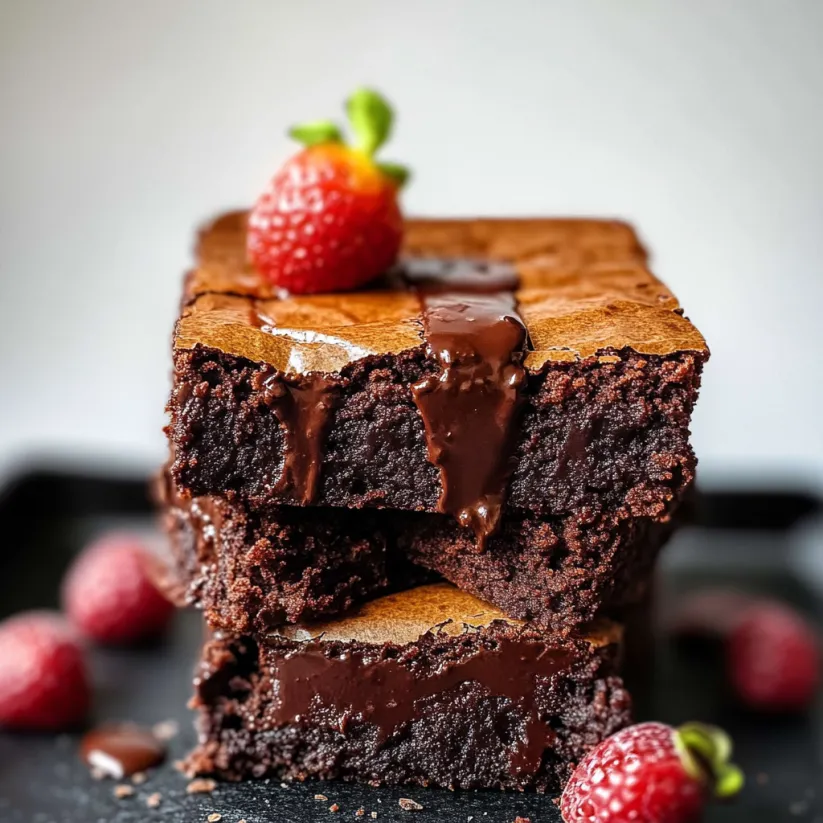
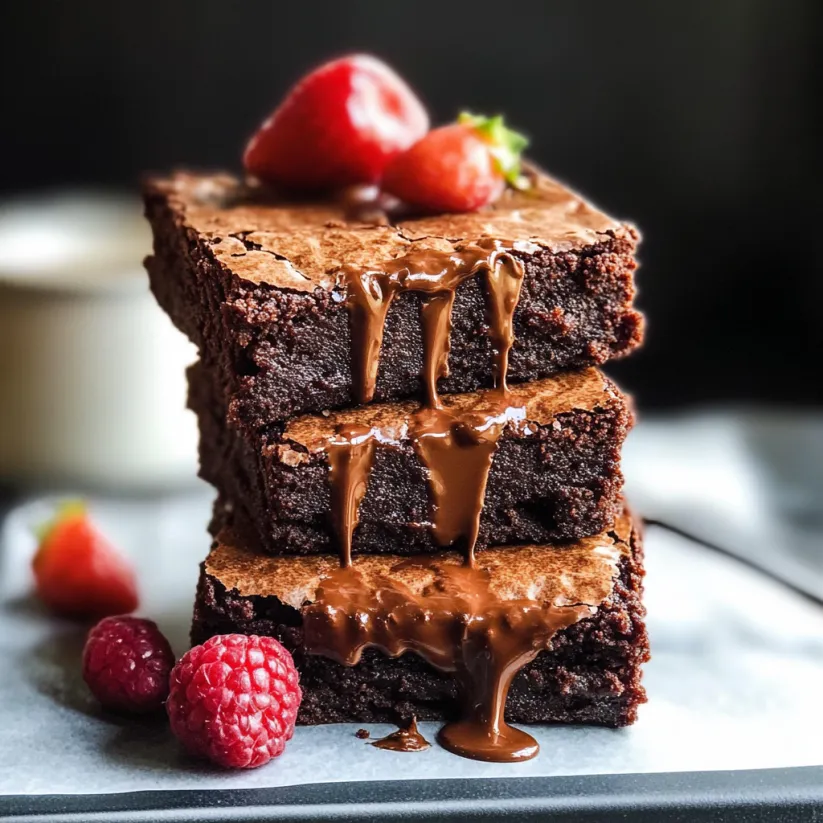
Rich dark chocolate brownies satisfy every craving for intense chocolate flavor with a perfectly chewy center and luscious moist crumb. Over the years these brownies have become my go to treat for potlucks and family parties – they always disappear quickly and leave everyone asking for the recipe.
I first baked these for my best friend’s birthday party and they became an instant tradition. Even the “not usually a dessert person” folks sneak back for a second piece.
Ingredients
- Dark chocolate: delivers the signature richness and deep cocoa flavor for classic brownies look for at least 70 percent cocoa for best results
- Butter: provides necessary moisture and creates that lovely shiny chewy top use good quality salted or unsalted butter for balanced taste
- All purpose flour: binds everything together without overpowering the chocolate too much flour can make brownies cakey so measure carefully
- Cocoa powder: intensifies the chocolate flavor go for Dutch process or high quality brands for richer taste
- Eggs: bring structure and help the brownies stay chewy and moist room temp eggs blend better and help with a crackly top
- Sugar: sweetens and also gives that shiny surface fine white sugar works best for this recipe
- Sea salt: optional but enhances the chocolate flavor and balances sweetness choose flaky sea salt flakes if you enjoy a little contrast in each bite
Step-by-Step Instructions
- Prep the Pan:
- Line a nine by nine inch square baking pan with parchment or greaseproof paper letting a bit overhang on the sides so you can lift the brownies out easily later
- Melt the Chocolate and Butter:
- Combine the chocolate and butter in a heatproof bowl set over a saucepan of simmering water or microwave in thirty second bursts on medium stirring between until smooth and combined
- Whisk the Eggs and Sugar:
- In a mixer bowl whisk together the eggs and sugar on high speed until the mixture is pale and fluffy this creates volume and gives the brownies their signature texture you can use a handheld mixer if you do not have a stand mixer
- Combine Wet and Dry Ingredients:
- Slowly pour the warm chocolate butter mixture into the whipped eggs folding gently with a whisk to blend keep the movement gentle to preserve the airiness
- Fold in Dry Ingredients:
- Sift cocoa powder and flour directly into the batter fold gently with a spatula just until combined overmixing can make the brownies dense
- Bake the Brownies:
- Pour the batter into your prepared pan and smooth the top bake in a preheated oven at three twenty five degrees fahrenheit or one sixty degrees celsius for fifteen minutes rotate the pan then bake for another ten to fifteen minutes until shiny on top and just set in the middle
- Cool and Slice:
- Let the brownies cool in the pan for at least one hour before using a warm clean knife to slice this resting time helps them firm up and enhances fudgy texture
 Save Pin
Each time I sprinkle sea salt on top before baking I remember my little sister crowding around the counter grinning asking if she can have a corner piece fresh from the oven. I truly think the chocolate you choose is the soul of this recipe – invest in a bar you love to snack on for the richest result.
Storage Tips
Let brownies cool fully before storing to prevent condensation and sogginess. Store sliced brownies in an airtight container and separate layers with parchment to keep them from sticking. They last up to three days in the fridge or freeze individually wrapped portions for up to three months for ready to go treats.
Ingredient Substitutions
Swap an equal amount of quality bittersweet chocolate if you do not have dark chocolate. You can use coconut oil instead of butter for a dairy free option but expect a slightly different crumb. Gluten free flour blends can work but use those specifically meant for baking to avoid grainy results.
Serving Suggestions
Serve warm with a scoop of vanilla ice cream or a drizzle of chocolate sauce for a decadent dessert. Brownies can also be cut into smaller pieces to serve as part of a dessert platter with fresh berries or nuts.
 Save Pin
Brownies Through History
Brownies have a long and debated history in North American kitchens often tied to home recipes passed through generations. Many credit their popularity to the balancing act of crisp edges and gooey centers which you will find in every bite of this recipe.
Commonly Asked Questions
- → How do you achieve a moist, chewy brownie texture?
Carefully melt butter and chocolate, whisk eggs and sugar until pale, and avoid overbaking for chewy centers.
- → What pan size works best for these brownies?
A 9 x 9-inch square pan ensures even thickness and ideal baking results.
- → How do you know when brownies are done baking?
Brownies are ready when the top is shiny and set, with edges slightly pulling from the sides of the pan.
- → What is the best way to slice brownies cleanly?
Use a hot, dry knife and wipe it between cuts to achieve neat, even edges.
- → How should dark chocolate brownies be stored?
Store in an airtight container for up to 3 days or freeze for longer freshness.
- → Can I add toppings or mix-ins?
Absolutely—try nuts, chocolate chips, or a sprinkle of sea salt to customize your brownies.