
 Save Pin
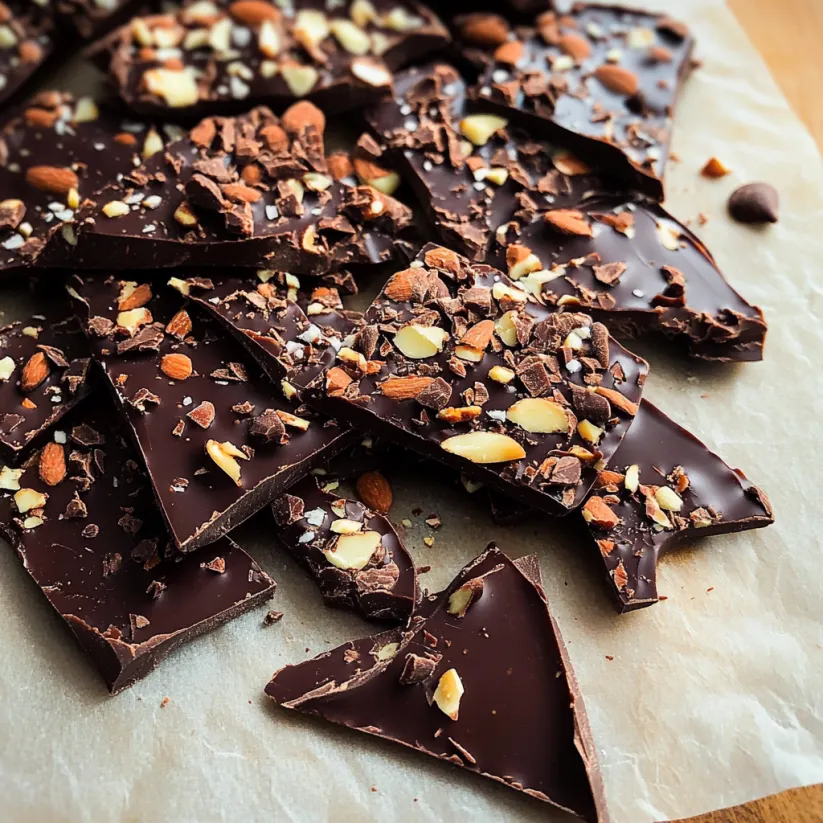
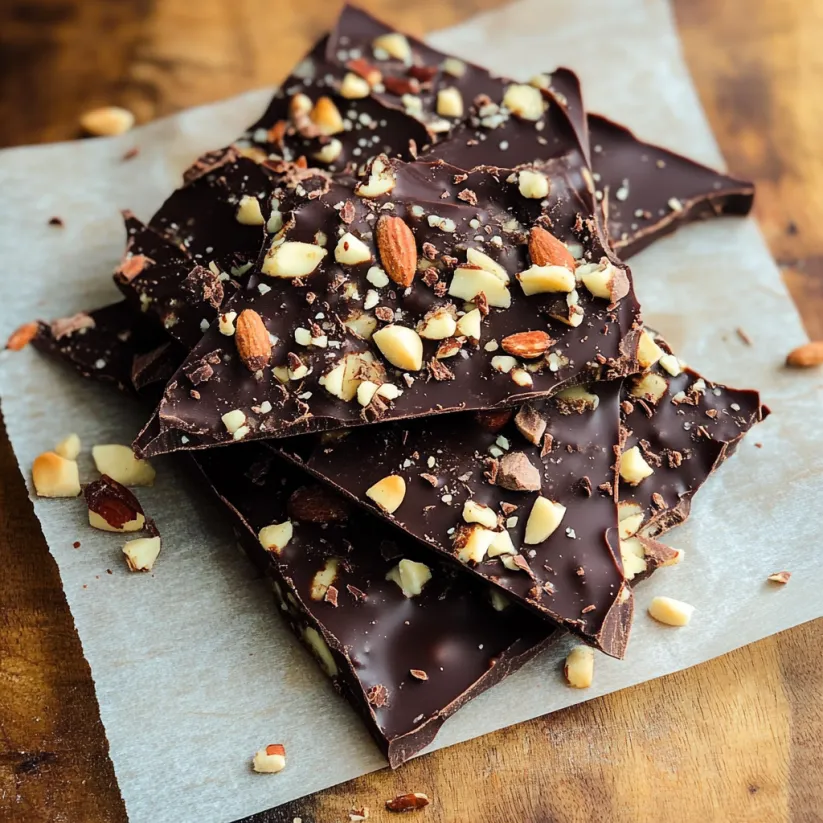
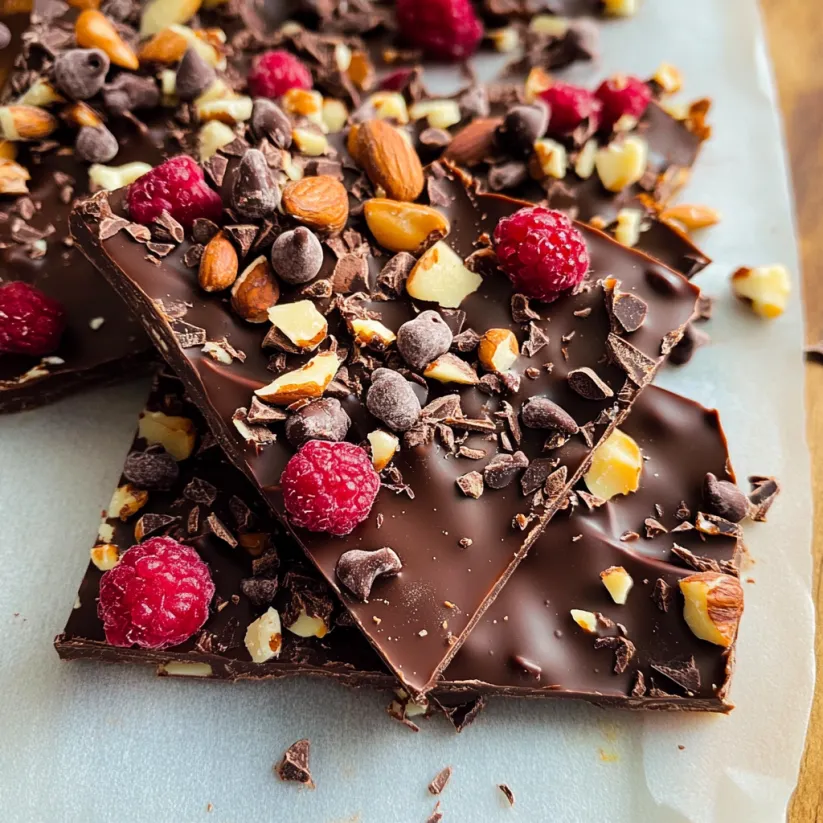
This chocolate bark is the ultimate quick dessert solution when you need something impressive with minimal effort. The combination of rich chocolate with crunchy nuts and chewy dried fruit creates the perfect balance of textures and flavors that keeps everyone coming back for more.
I first made this chocolate bark when I needed a last minute hostess gift, and it has since become my signature treat. Friends now request it for gatherings, and I always keep the ingredients on hand for chocolate emergencies.
Ingredients
- Quality chocolate chips or chopped chocolate: Good chocolate makes all the difference here, as it's the foundation of the recipe. Look for 60% cacao content for optimal flavor balance.
- Raw nuts or seeds: These provide essential crunch and healthy fats. Choose freshly packaged nuts without any rancid smell for best results.
- Dried cranberries or other dried fruit: The chewy sweetness contrasts beautifully with the chocolate. Look for unsweetened varieties when possible for a less sugary treat.
- Flaky sea salt: This optional ingredient elevates the entire bark by enhancing all the flavors. Maldon sea salt works particularly well.
Step-by-Step Instructions
- Toast the nuts:
- Preheat your oven to 350°F and spread nuts evenly on a baking sheet. Roast for 6 to 9 minutes until you can smell their fragrance and they begin to take on a light golden color. Toasting intensifies their flavor and creates a deeper dimension in the final bark.
- Melt the chocolate:
- Add chocolate to a microwave safe bowl and heat in 30 second increments, stirring thoroughly between each. Stop when the chocolate is about 90% melted and continue stirring off heat until smooth. This prevents overheating which can make the chocolate seize or become grainy.
- Spread the chocolate:
- Line a baking sheet with parchment paper and pour the melted chocolate into the center. Use a silicone spatula to spread it evenly to about 1/4 inch thickness. The chocolate should be thin enough to break easily when cooled but thick enough to support your toppings.
- Add the toppings:
- Sprinkle your chopped toasted nuts, dried fruit, and optional flaky salt over the chocolate surface. Gently press the ingredients into the chocolate with your palms to ensure they stick when the bark is broken apart later.
- Cool until hardened:
- Either let the bark set at room temperature for 2 to 4 hours or speed up the process by placing it in the refrigerator for about 15 minutes. The chocolate should be completely solid before breaking.
- Break into pieces:
- Use your hands to break the hardened chocolate into approximately 25 rustic pieces. The irregular edges give the bark its homemade charm.
 Save Pin
My favorite part of making chocolate bark is the creative freedom it offers. One winter, I made a double batch for holiday gifts and my kitchen smelled like a chocolate shop. My daughter now helps me make it, carefully arranging the toppings in patterns she designs herself.
Storage Tips
Your chocolate bark will stay fresh for up to one week when stored at room temperature in an airtight container. For longer storage, you can refrigerate it for up to three weeks, though the texture may change slightly. Avoid storing in warm areas as the chocolate can soften and lose its snap. If giving as gifts, make the bark no more than two days in advance for optimal freshness.
Flavor Variations
The recipe framework allows for endless customization. Try white chocolate with pistachios and dried cranberries for a festive holiday version. Dark chocolate with espresso beans and hazelnuts creates a sophisticated coffee lovers bark. Milk chocolate with pretzels and mini marshmallows makes a crowd pleasing s'mores variation that children adore. The key is maintaining the ratio of chocolate to mix ins so the bark holds together properly.
Troubleshooting Common Issues
Chocolate bark seems simple, but a few techniques ensure success. If your chocolate develops white streaks or spots, this is called blooming and happens when chocolate temperature fluctuates. It remains safe to eat but looks less appealing. To prevent this, avoid refrigerating unless necessary and store at consistent room temperature. If your bark is too thick to break nicely, spread it thinner next time. Too thin, and it will shatter into tiny pieces instead of attractive chunks.
 Save Pin
Commonly Asked Questions
- → How long does homemade chocolate bark stay fresh?
The chocolate bark will stay fresh for up to 1 week when stored in a covered container at room temperature. For longer storage, you can refrigerate it, but allow it to come to room temperature before serving for the best flavor and texture.
- → Can I use white or milk chocolate instead of dark?
Yes! You can substitute white or milk chocolate for the dark chocolate in this bark. The technique remains the same, though white chocolate may be slightly more sensitive to overheating, so melt it with extra care.
- → What's the best way to melt chocolate without burning it?
The safest method is using short 30-second microwave intervals, stirring between each. Stop when chocolate is about 90% melted and let residual heat complete the process. Alternatively, use a double boiler method with a heat-proof bowl over simmering water.
- → How can I make this chocolate bark allergen-friendly?
For nut allergies, substitute with seeds like pepitas or sunflower seeds. For dairy-free/vegan versions, use dairy-free chocolate such as Enjoy Life brand. Always check ingredient labels if making for someone with severe allergies.
- → Do I need to temper the chocolate for this bark?
This quick method doesn't require formal tempering. The careful melting process helps maintain some of chocolate's structure. The bark might develop a slight bloom (whitish appearance) over time, but this doesn't affect taste, just appearance.
- → What are some creative topping combinations for chocolate bark?
Try pistachios with dried cherries; almonds with orange zest; coconut with dried mango; crushed peppermint candies; pretzels with sea salt; or dried strawberries with hazelnuts. The possibilities are endless!