
 Save Pin
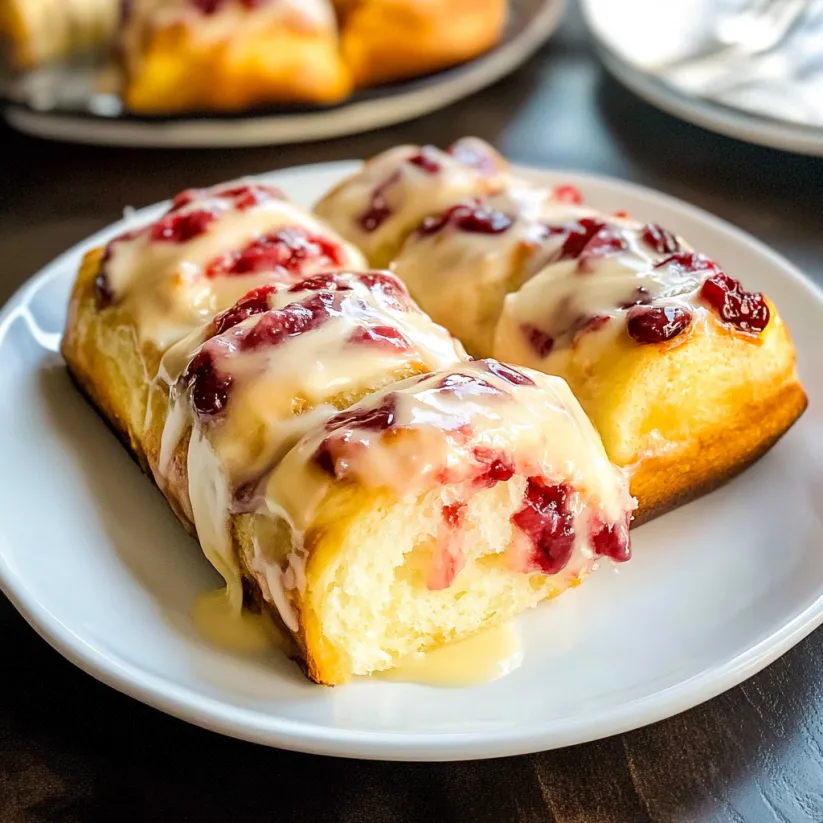
This cherry roll recipe transforms ordinary breakfast into a bakery-worthy experience with sweet pillowy dough wrapped around tart cherry filling and topped with creamy icing. Perfect for weekend mornings when you want something special that fills your kitchen with irresistible aromas.
I first made these cherry rolls during a snowy weekend when my family was craving something special. The bright pop of cherry against the soft dough instantly became our favorite weekend tradition. Now my kids hover around the oven waiting for that moment when the rolls emerge golden and ready for icing.
Ingredients
- Active dry yeast: One package ensures proper rise and fluffy texture. Always check expiration date for freshness.
- Warm milk: Creates the perfect environment to activate yeast. Must be lukewarm around 100°F not too hot or cold.
- Granulated sugar: Provides food for yeast and sweetens the dough. A bit goes into blooming the yeast first.
- Unsalted butter: Adds richness and tender texture to the dough. Room temperature butter incorporates more easily.
- Salt: Enhances flavors and controls yeast activity. Even sweet recipes need salt for proper flavor balance.
- Eggs: Provide structure protein and richness. Room temperature eggs blend better into the dough.
- All purpose flour: Creates the structure of the rolls. Measure by spooning into measuring cups for proper amount.
- Cherry pie filling: Offers sweet tart flavor and gorgeous color. Use quality brand for best results.
- Cream cheese: Full fat cream cheese makes the tangiest most flavorful icing. Allow to soften completely for smoothest results.
- Powdered sugar: Creates silky smooth icing without graininess. Sift if you notice any lumps.
- Vanilla extract: Enhances the icing with warm aromatic notes. Pure vanilla offers superior flavor.
Step-by-Step Instructions
- Bloom the Yeast:
- Pour lukewarm milk into a small bowl and add a teaspoon of sugar from your measured amount. Sprinkle yeast over top and let sit undisturbed for about 20 seconds before gently stirring once. Allow mixture to sit 5–10 minutes until foamy and fragrant. This step confirms your yeast is alive and active. The mixture should look bubbly and smell pleasantly yeasty if successful.
- Prepare the Dough:
- Add remaining sugar butter salt eggs and flour to your stand mixer bowl. Pour in the foamy yeast mixture. Using the dough hook attachment mix on low speed until ingredients combine then increase to medium low speed for about 5 minutes. The dough should pull away from the sides but remain slightly tacky to touch. If too sticky add flour one tablespoon at a time.
- First Rise:
- Transfer dough to a bowl lightly coated with oil turning once to coat all sides. Cover with plastic wrap or clean kitchen towel. Place in a warm draft free area for approximately one hour. The dough should double in size and feel light and airy when gently poked. This slow rise develops flavor and texture.
- Roll and Fill:
- On a lightly floured surface roll dough into a 16×12 inch rectangle using gentle even pressure. Spread cherry pie filling evenly across the surface leaving a half inch border along one long edge. This border helps seal the roll. Work carefully to distribute filling evenly without tearing the dough.
- Form the Rolls:
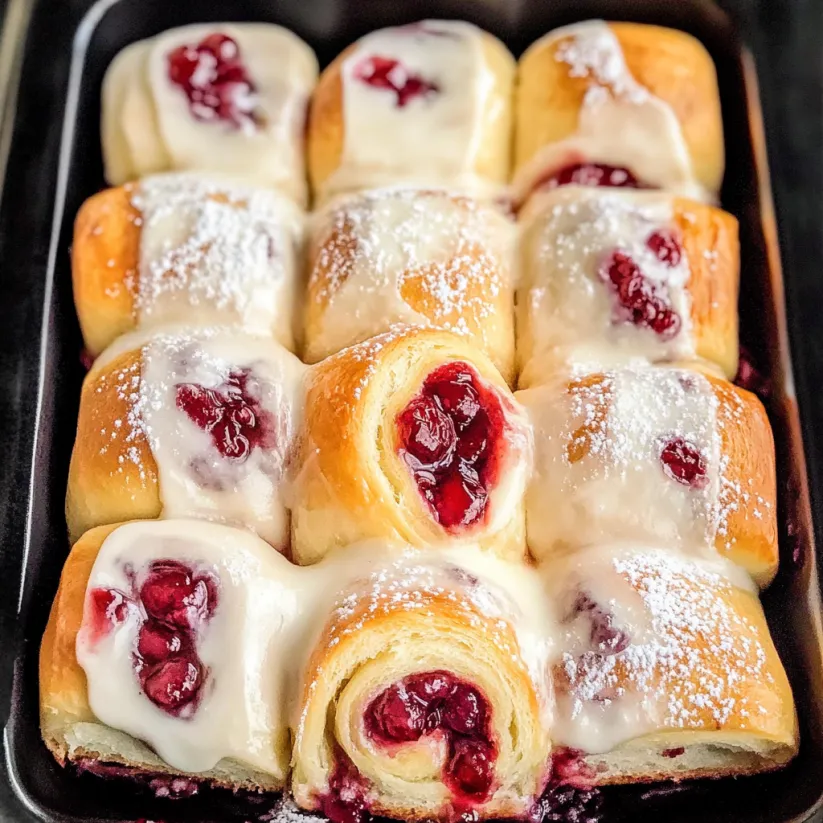
- Starting with the long edge opposite your clean border roll the dough into a tight cylinder. Use both hands to maintain even pressure. Pinch the seam to seal. Use a sharp knife or unflavored dental floss to cut into 1¾ inch slices. Place rolls cut side up in greased baking pan leaving space between each for expansion.
- Second Rise:
- Cover rolls with towel or plastic wrap and let rise in warm area for 30 minutes until noticeably puffed and nearly doubled. This second rise creates the final light texture. The rolls should be touching or nearly touching before baking.
- Bake to Golden Perfection:
- Bake in preheated 350°F oven for 20 minutes until tops are light golden brown. Check at 15 minutes as oven temperatures vary. The rolls should reach internal temperature of about 190°F when fully baked. The kitchen will fill with an amazing aroma of sweet yeasted dough.
- Create the Icing:
- While rolls bake prepare cream cheese icing by beating together softened butter cream cheese powdered sugar vanilla and salt until light and fluffy. The mixture should be smooth and spreadable. Adjust consistency with tiny amounts of milk if too thick or more powdered sugar if too thin.
- Finish and Serve:
- Spread icing generously over warm rolls allowing it to melt slightly into the crevices. Serve immediately for the ultimate experience. The contrast between warm rolls tart cherries and sweet tangy icing creates an irresistible combination.
 Save Pin
My favorite part of making these rolls is watching everyone gather around when they come out of the oven. There's something magical about homemade yeasted dough that brings people together. I especially love using tart cherries because they balance the sweet dough and icing perfectly creating that perfect bite where all flavors come together.
Overnight Preparation Method
For fresh morning rolls without early wakeup prepare the recipe through placing cut rolls in the baking pan. Cover tightly with plastic wrap and refrigerate overnight up to 12 hours. In the morning remove from refrigerator and allow to come to room temperature and complete final rise about 45–60 minutes. This approach actually enhances flavor as the dough develops complexity overnight.
The rolls may take an extra few minutes to bake when coming from the refrigerator. The cold center requires slightly longer baking time but the results are worth it. Nothing beats serving these warm from the oven with minimal morning effort.
Troubleshooting Sticky Dough
Working with enriched dough containing butter and eggs can sometimes create sticky handling challenges. If your dough feels too tacky resist adding too much additional flour which can make the rolls tough. Instead lightly oil your hands and work surface when handling.
The dough should feel soft and elastic not dry or stiff. Weather conditions like humidity can affect flour absorption so be prepared to make small adjustments. An overly wet dough creates dense heavy rolls while too dry results in tough crumbly texture.
Serving Suggestions
These cherry rolls make an impressive centerpiece for any brunch spread. Pair them with savory dishes like egg casseroles or breakfast meats for balance. For serving consider a light dusting of powdered sugar over the icing for visual appeal.
For holiday mornings sprinkle with festive colored sugar before baking. These rolls also make thoughtful gifts when packaged in decorative boxes or tins. Include baking instructions if giving unbaked rolls to friends or neighbors.
 Save Pin
Commonly Asked Questions
- → How do I know if my yeast is active?
Your yeast should foam up after about 5-10 minutes in lukewarm milk with a bit of sugar. If it doesn't foam, it's likely dead and you'll need new yeast. Always check the expiration date before using.
- → What temperature should my milk be for blooming yeast?
The milk should be lukewarm, between 98°F and 105°F (36.5°C to 40.5°C). If too cold, the yeast won't activate; if too hot, it will kill the yeast. Using a digital thermometer is the most reliable method.
- → Can I make the dough ahead of time?
Yes, you can prepare the dough and place it in the refrigerator after the first rise. The cold temperature slows yeast activity. The next day, let the dough come to room temperature before rolling and filling.
- → Why should ingredients be at room temperature?
Room temperature butter and eggs help the dough come together properly and emulsify better, creating a more airy, fluffy texture in the final rolls. Take them out of the refrigerator about 2 hours before making the dough.
- → Can I use different fillings in these rolls?
Absolutely! While cherry filling creates a wonderful tart-sweet balance, you can substitute other fruit fillings like blueberry, strawberry, or apple pie filling based on your preference or what's seasonally available.
- → How do I store leftover cherry rolls?
Store leftover rolls in an airtight container at room temperature for 2-3 days. For longer storage, refrigerate for up to a week. Warm slightly before serving for the best texture and flavor.