
 Save Pin
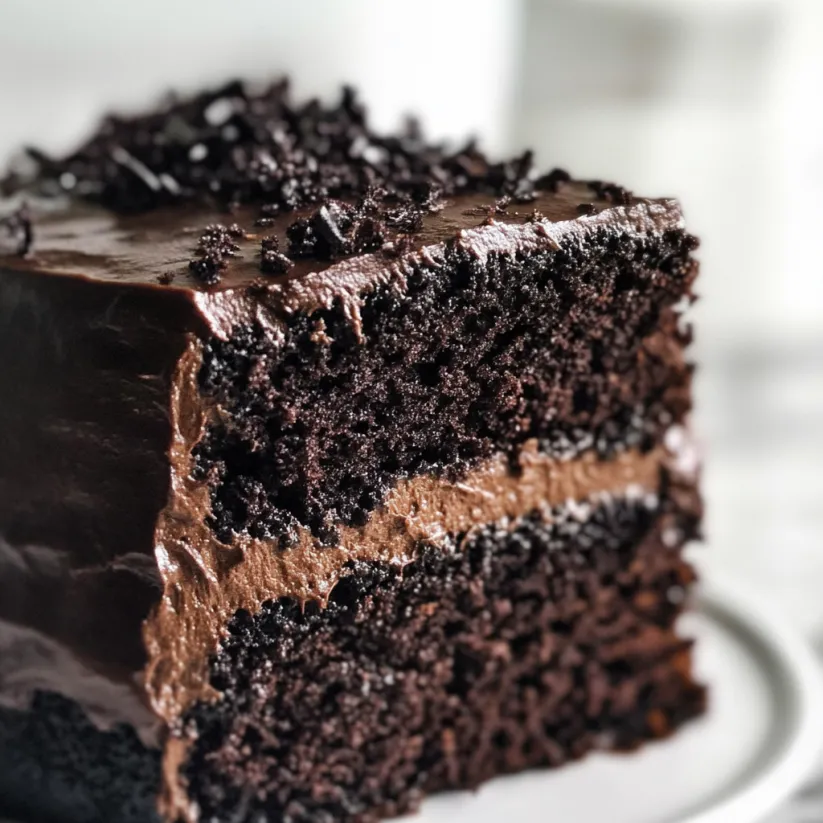
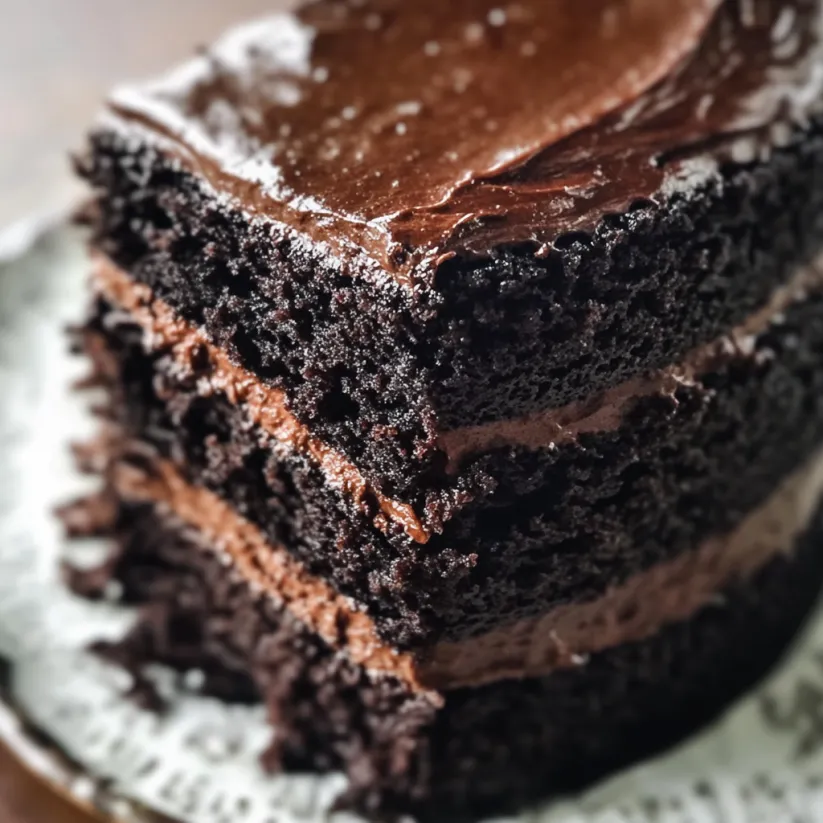
This classic Brooklyn Blackout Cake recipe brings the iconic New York dessert right to your kitchen. With four layers of deeply chocolate cake, rich chocolate pudding filling, and a smooth chocolate frosting, this indulgent creation is finished with cake crumbs pressed across the surface for that signature blackout effect. It's a time-honored dessert that chocolate lovers have been enjoying since its creation at Brooklyn's famous Ebinger's Bakery in the mid-20th century.
I first attempted this legendary cake for my father's birthday after he reminisced about the original from his childhood in Brooklyn. After seeing his face light up with that first bite I knew this recipe would become our family's special occasion tradition.
Ingredients
- All purpose flour Creates the perfect structure without being too heavy
- Dutch processed cocoa Provides a deeper richer chocolate flavor than natural cocoa
- Brown sugar Adds moisture and a subtle molasses undertone
- Coffee Intensifies the chocolate flavor without adding coffee taste
- Buttermilk Creates tenderness and helps activate the leavening agents
- Semisweet chocolate Use high quality brands with 60 to 70 percent cocoa solids for best results
- Corn syrup A small amount gives the frosting that professional bakery shine
- Vanilla extract Use pure not imitation for the best flavor profile
Step-by-Step Instructions
- Prepare the Baking Pans
- Properly grease two 8 inch round cake pans and line the bottoms with parchment paper. This essential step ensures your cakes will release cleanly allowing you to create perfect layers. The parchment should be cut to fit precisely in the bottom of each pan.
- Make the Chocolate Cake Batter
- Start by melting butter in a large saucepan then blend in cocoa powder until completely smooth. This method blooms the cocoa powder releasing its full flavor potential. Add both sugars and stir until the mixture resembles wet sand before removing from heat. Incorporate the liquid ingredients gradually to prevent lumps then fold in the dry ingredients just until combined. Overmixing at this stage can lead to tough cake layers.
- Bake and Cool the Cakes
- Pour the batter evenly between prepared pans and bake in a 325°F oven for exactly 35 to 40 minutes. The lower temperature ensures the cakes bake evenly without doming. Test for doneness with a wooden toothpick inserted in the center it should come out clean or with a few moist crumbs. Allow cakes to cool in pans for precisely 10 minutes before transferring to wire racks to cool completely. Cooling in pans longer can make them difficult to remove.
- Prepare the Chocolate Pudding Filling
- Combine sugar cornstarch and salt in a heavy bottomed saucepan then gradually whisk in milk until completely smooth. Cook over medium heat stirring constantly with a silicone spatula to prevent scorching. Once the mixture thickens and comes to a boil cook for exactly one minute more. Remove from heat add chocolate and vanilla stirring until silky. Press plastic wrap directly onto the pudding surface to prevent skin formation and refrigerate until thoroughly chilled.
- Create the Chocolate Frosting
- Gently melt chocolate and butter in a double boiler stirring frequently until completely smooth. The water in your double boiler should be simmering not boiling to prevent overheating the chocolate. Remove from heat and quickly whisk in hot water all at once followed by corn syrup and vanilla. Refrigerate the frosting for exactly 25 to 30 minutes whisking occasionally until it reaches spreadable consistency.
- Assemble the Four Layer Cake
- Using a serrated knife carefully slice each cake horizontally into two equal layers. Set one layer aside for making crumbs. Place one layer on your serving plate and spread with exactly half of the chilled pudding stopping about 1/4 inch from the edge to prevent overflow. Add the second layer top with remaining pudding then crown with the third layer gently pressing to secure.
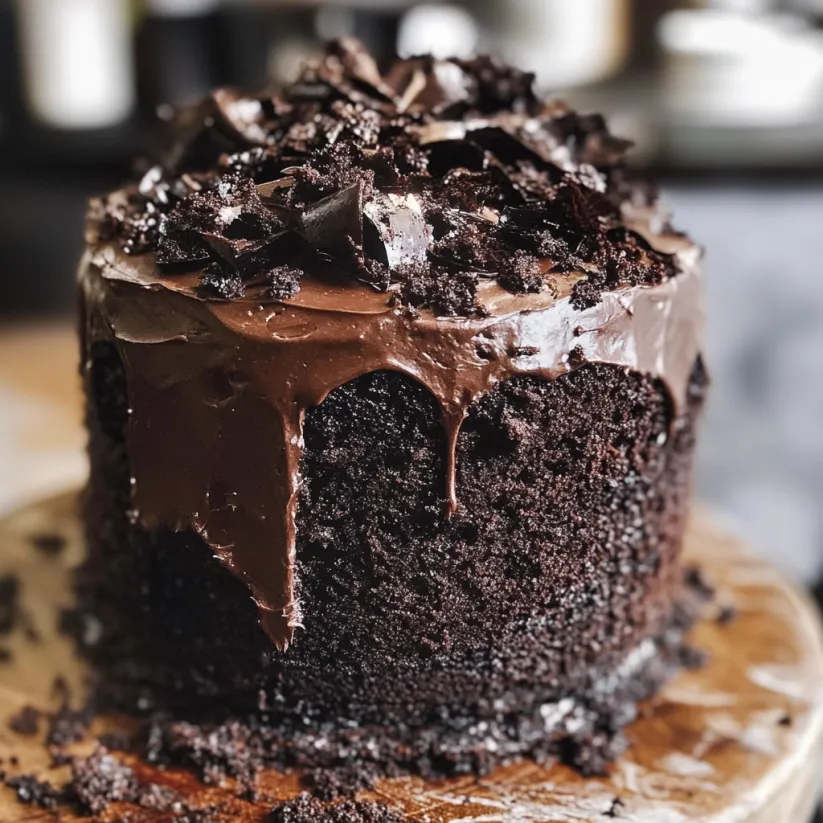
- Apply Frosting and Crumb Coating
- Frost the entire cake with the chocolate frosting using an offset spatula for the sides and a straight spatula for the top. Work quickly as the frosting can set up fast. Crumble the reserved cake layer into fine crumbs using your fingers or a food processor. Gently press these crumbs all over the frosted cake including the sides for the signature blackout effect. This traditional technique gives the cake its name and distinctive texture.
 Save Pin
When I make this cake I always save a few extra crumbs to sprinkle on each plate when serving. My grandmother once told me that at the original Ebinger's Bakery they would give customers a small bag of extra crumbs with each cake a tradition I've happily continued in our family celebrations.
The History Behind Brooklyn Blackout Cake
This iconic dessert was created during World War II by Brooklyn's famous Ebinger's Bakery. Named after the blackout drills practiced in Brooklyn to protect the Brooklyn Navy Yard from enemy attacks the cake's dark appearance and coating of chocolate crumbs mimicked the darkened buildings and streets during these military drills. Though Ebinger's closed in 1972 taking their exact recipe with them this version captures the essence of what made the original so beloved throughout New York. Many Brooklyn natives still remember waiting in long lines at the bakery for this chocolate masterpiece.
Storage and Make-Ahead Tips
This cake actually improves with time as the flavors meld together. You can make it up to two days before serving keeping it refrigerated. Store leftover cake covered in the refrigerator for up to five days though the texture is best within the first three. For longer storage individual slices freeze beautifully wrapped tightly in plastic wrap then aluminum foil for up to three months. Thaw overnight in the refrigerator before bringing to room temperature to serve. The pudding filling prevents the cake from drying out during storage making this an excellent make-ahead dessert for special occasions.
Serving Suggestions
While this cake is stunning on its own consider serving it with complementary accompaniments. A dollop of lightly whipped cream provides a lovely contrast to the intense chocolate flavors. Fresh raspberries or strawberries offer a bright acidic balance that cuts through the richness. For coffee lovers a shot of espresso served alongside creates a perfect pairing. When serving allow the cake to sit at room temperature for about 30 minutes before eating as the flavors and textures are at their best when not cold from the refrigerator.
 Save Pin
Commonly Asked Questions
- → Why is it called a Brooklyn Blackout Cake?
The Brooklyn Blackout Cake originated during World War II at Ebinger's Bakery in Brooklyn. It was named after the blackout drills performed by the Civilian Defense Corps, where residents had to darken their windows to prevent enemy aircraft from identifying targets. The cake's dark chocolate appearance and coating of chocolate crumbs resembled these blackouts.
- → Can I make the Brooklyn Blackout Cake in advance?
Yes, you can make this cake 1-2 days in advance. The flavors actually develop and improve after refrigeration. Store it covered in the refrigerator and bring to room temperature about 30 minutes before serving for the best texture and flavor.
- → What can I substitute for the coffee in this cake?
If you prefer to avoid coffee, you can substitute with hot water or hot chocolate. The coffee enhances the chocolate flavor without adding coffee taste, but hot water will still provide the moisture needed. For more chocolate intensity, use hot chocolate instead.
- → Can I freeze leftover Brooklyn Blackout Cake?
Yes, you can freeze leftover cake. Cut into individual slices, wrap each piece tightly in plastic wrap, then in aluminum foil, and store in a freezer-safe container. Freeze for up to 3 months. Thaw overnight in the refrigerator before bringing to room temperature to serve.
- → What makes the cake so moist?
The exceptional moisture comes from several key ingredients: buttermilk, coffee, brown sugar, and the proper ratio of cocoa to flour. These elements work together to create a tender crumb that stays moist for days.
- → Can I use natural cocoa powder instead of Dutch-processed?
While Dutch-processed cocoa is recommended for its smoother flavor and darker color, natural cocoa powder can be substituted. If using natural cocoa, add ¼ teaspoon of baking soda to balance the acidity. The cake may have a slightly different color and flavor profile but will still be delicious.