
 Save Pin
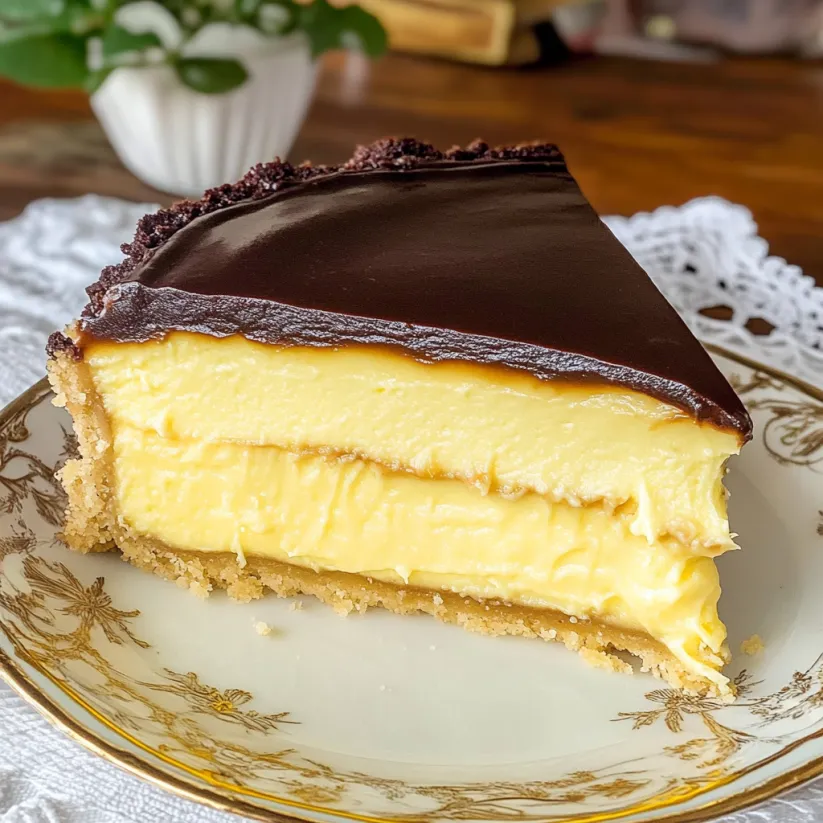
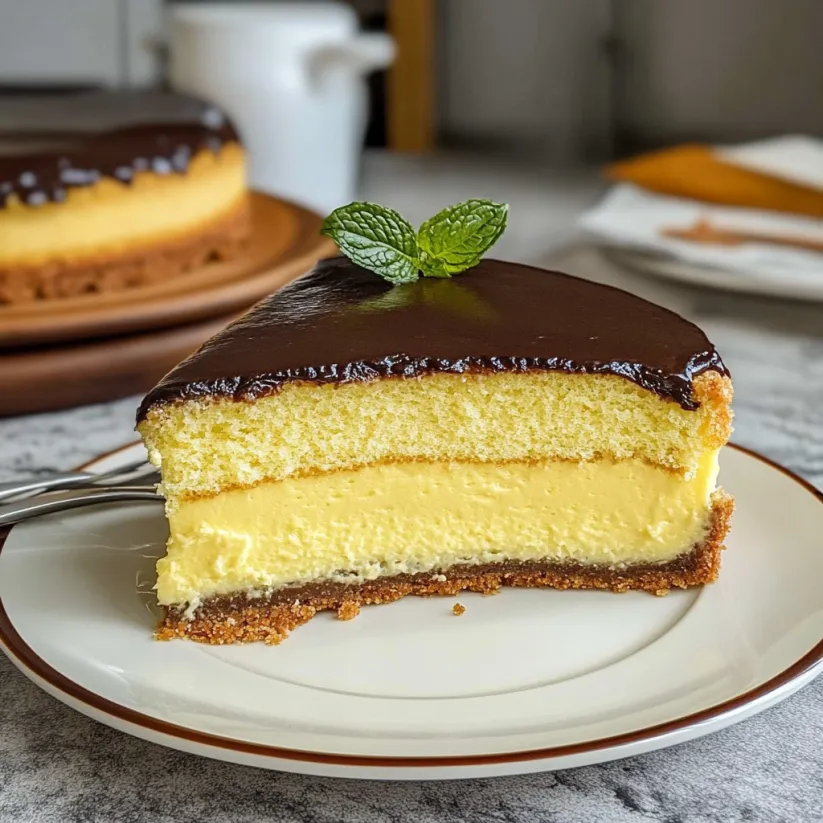
This classic Boston Cream Pie brings together buttery cake layers, silky vanilla custard, and glossy chocolate topping for an unforgettable dessert experience. The contrast between the fluffy sponge, creamy filling, and rich chocolate creates a perfect balance that has made this treat a beloved American classic for generations.
I first made this Boston Cream Pie for my mother's birthday after she reminisced about enjoying it as a child. The look on her face when she took that first bite instantly made this recipe a permanent fixture in our family celebrations.
Ingredients
- For The Cake
- All-purpose flour forms the foundation for our tender cake layers
- Baking powder provides the perfect rise for light and fluffy texture
- Salt enhances all the flavors and balances sweetness
- Unsalted butter creates richness use room temperature for best results
- Granulated sugar sweetens while helping create fine crumbs
- Eggs provide structure and richness for a tender crumb
- Vanilla extract adds warm aromatic notes choose pure extract for best flavor
- Whole milk adds moisture and tenderness to the cake
- For the Custard Filling
- Whole milk creates the base for our silky smooth custard
- Granulated sugar sweetens without overwhelming
- Salt balances the sweetness and enhances flavor
- Cornstarch thickens the custard to the perfect spreadable consistency
- Egg yolks add richness and that signature golden color
- Vanilla extract provides aromatic warmth
- For the Chocolate Glaze
- Heavy cream creates a luscious base for our chocolate
- Semi-sweet chocolate delivers the perfect balance of sweet and bitter notes
- Corn syrup gives the glaze its beautiful shine and prevents crystallization
Step-by-Step Instructions
- Prepare the Cake Batter
- Begin by preheating your oven to 350°F and preparing your cake pans. The butter should be genuinely soft but not melting for proper creaming. When beating the butter and sugar, continue until the mixture turns almost white and increases noticeably in volume this incorporates air for a lighter texture. Add eggs one at a time, allowing each to fully incorporate before adding the next this prevents curdling.
- Create Perfect Cake Layers
- Pour equal amounts of batter into your prepared pans. After filling the pans, gently tap them on the counter to release any trapped air bubbles. Watch carefully during baking the edges will pull slightly away from the pan and the center will spring back when touched when done. Cool in pans initially to prevent cracking, then transfer to racks for complete cooling.
- Craft the Silky Custard
- Patience is key when making the custard. Heat the milk mixture slowly to prevent scorching. When tempering the egg mixture, pour the hot milk in a thin, steady stream while whisking vigorously to prevent scrambling. Return the mixture to the heat and stir constantly using a figure-eight motion to reach all areas of the pan. The custard should coat the back of a spoon and leave a clear path when you run your finger through it.
- Perfect the Chocolate Glaze
- For the glaze, heat cream just until bubbles form around the edges do not boil. Pour over the chopped chocolate and let sit undisturbed for 3 minutes before stirring. Stir from the center outward until completely smooth and glossy. Allow to cool slightly until it reaches the perfect pouring consistency thick enough to coat but still fluid enough to drip attractively.
- Assemble Your Masterpiece
- Place the first cake layer on a serving plate with strips of parchment tucked underneath to keep the plate clean. Spread the custard in an even layer stopping about half an inch from the edge as it will spread when the top layer is added. Place the second layer gently on top and press down very slightly. Pour the glaze from the center of the cake, using an offset spatula to guide it to the edges. Allow some to drip naturally down the sides for that classic look.
 Save Pin
I absolutely love the moment when the warm chocolate glaze hits the chilled cake and creates that perfect shiny finish. My grandmother taught me to pour from the center and work outward in a spiral motion her secret to that flawless, professional-looking top that never fails to draw gasps when brought to the table.
Perfect Make-Ahead Dessert
This Boston Cream Pie actually improves with a little time in the refrigerator. The flavors meld together beautifully and the cake absorbs some of the moisture from the custard creating an even more harmonious texture. You can make this dessert up to two days ahead of serving making it perfect for entertaining when you want to minimize last-minute preparation. Just keep it covered in the refrigerator and bring it out about 20 minutes before serving to take the chill off slightly.
Troubleshooting Tips
If your custard seems too thin even after cooking, you may need to return it to the heat for a bit longer. Remember that it will continue to thicken as it cools. For a cake that seems dry, try brushing each layer with a simple syrup before adding the custard this adds moisture and subtle sweetness. If your chocolate glaze sets before you finish pouring, simply warm it gently over a pan of hot water to restore its flowing consistency.
Serving Suggestions
While Boston Cream Pie is spectacular on its own, you can elevate it even further with thoughtful presentation. A dusting of cocoa powder or a sprinkle of chocolate shavings adds visual interest. Serve alongside fresh berries for a pop of color and complementary tartness. For special occasions, add a scoop of vanilla bean ice cream on the side the warm and cold contrast is absolutely divine. A dollop of lightly sweetened whipped cream never goes amiss either.
Storage and Freshness
Boston Cream Pie is best stored in the refrigerator due to the custard filling. Cover loosely with a cake dome or place toothpicks around the top and drape with plastic wrap to prevent the glaze from sticking. The cake will maintain its best quality for up to 3 days. While freezing is possible it can affect the texture of the custard and glaze so I recommend enjoying it fresh whenever possible.
 Save Pin
Commonly Asked Questions
- → Why is Boston Cream Pie called a pie when it's actually a cake?
Boston Cream Pie is called a pie for historical reasons. When it was created in the 1850s at Boston's Parker House Hotel, cakes and pies were often baked in the same pans, and the names were used interchangeably. Additionally, at that time, desserts with creamy fillings were commonly called 'pies' regardless of their outer structure. The name has persisted as part of its traditional identity despite being a cake by modern definitions.
- → Can I make Boston Cream Pie ahead of time?
Yes, Boston Cream Pie is excellent made ahead of time. You can prepare it up to 2 days in advance and store it covered in the refrigerator. In fact, allowing it to chill overnight helps the flavors meld together and makes the cake easier to slice cleanly. The custard filling and chocolate glaze need time to set properly, making this an ideal make-ahead dessert for special occasions.
- → How do I prevent the custard filling from being runny?
To prevent runny custard, make sure to cook it until it's properly thickened - it should coat the back of a spoon and hold a line when you run your finger through it. Be sure to include the cornstarch as directed, and allow the custard to cool completely in the refrigerator before assembling the cake. Finally, chill the assembled cake for at least an hour to help the custard set firmly between the layers.
- → What's the best way to cut Boston Cream Pie neatly?
For clean slices of Boston Cream Pie, chill the assembled cake for at least an hour before serving. Use a sharp knife dipped in hot water and wiped clean between each cut. The heat helps the knife glide through the chocolate topping without cracking it, while the clean blade prevents smearing. Cut with a gentle sawing motion rather than pressing straight down to avoid squeezing out the custard filling.
- → Can I use boxed cake mix or instant pudding to make Boston Cream Pie?
While traditional Boston Cream Pie uses homemade components, you can certainly use boxed cake mix or instant pudding mix as shortcuts. For the cake, choose a yellow or vanilla cake mix. For the filling, cook instant vanilla pudding with slightly less milk than called for to create a firmer consistency. The chocolate glaze is worth making from scratch as it's quick and provides a superior texture and flavor to the finished dessert.
- → How should I store leftover Boston Cream Pie?
Store leftover Boston Cream Pie in an airtight container in the refrigerator. Because of the custard filling, it should not be left at room temperature for more than 2 hours. Properly stored, it will keep well for up to 3 days, though the texture is best within the first 48 hours. For the freshest taste, bring slices to cool room temperature for about 15 minutes before serving.