
 Save Pin
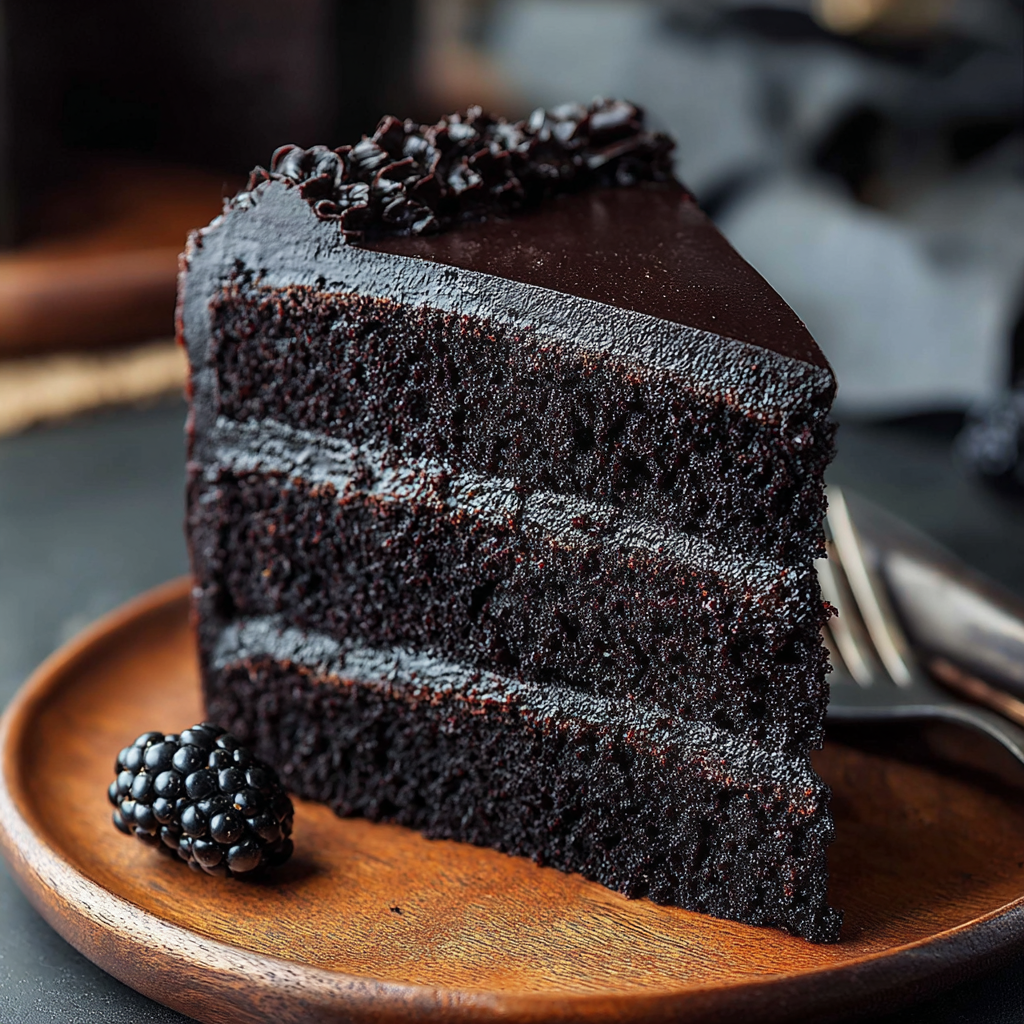
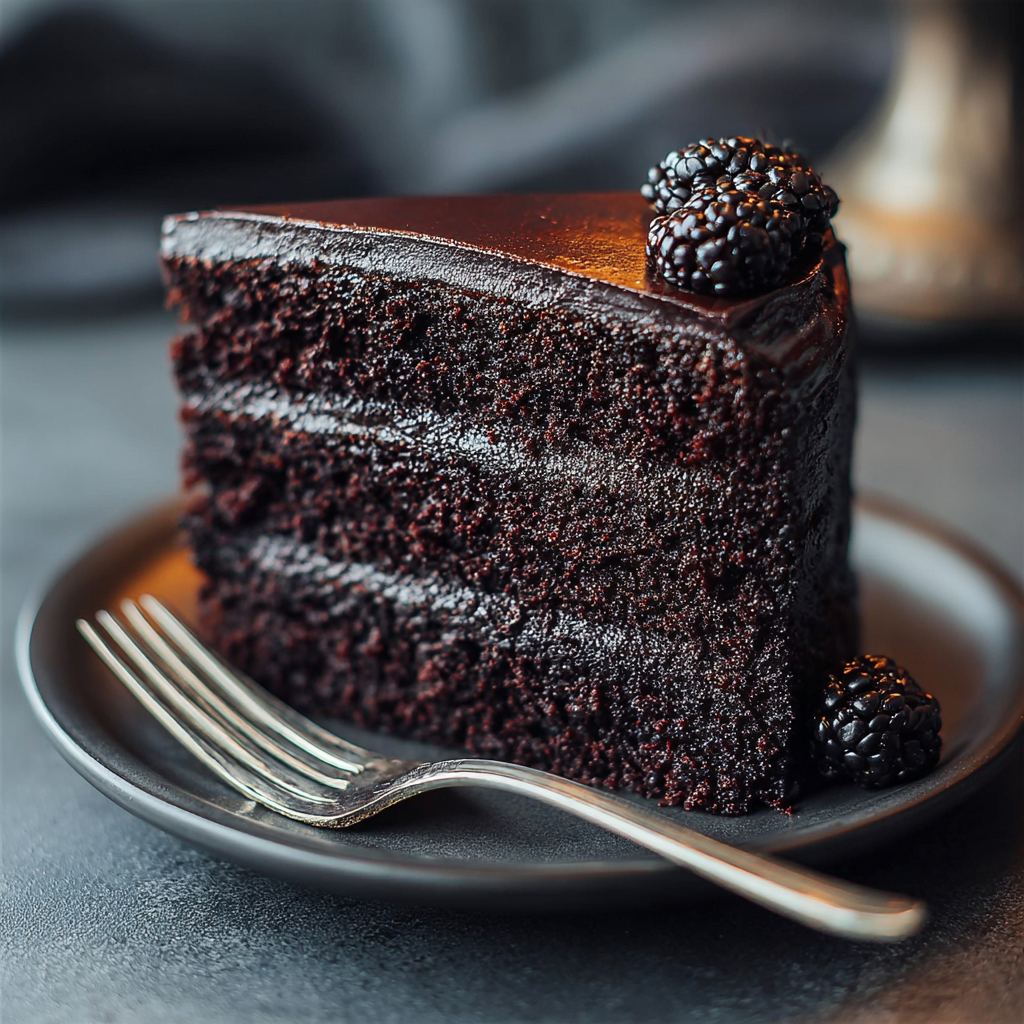
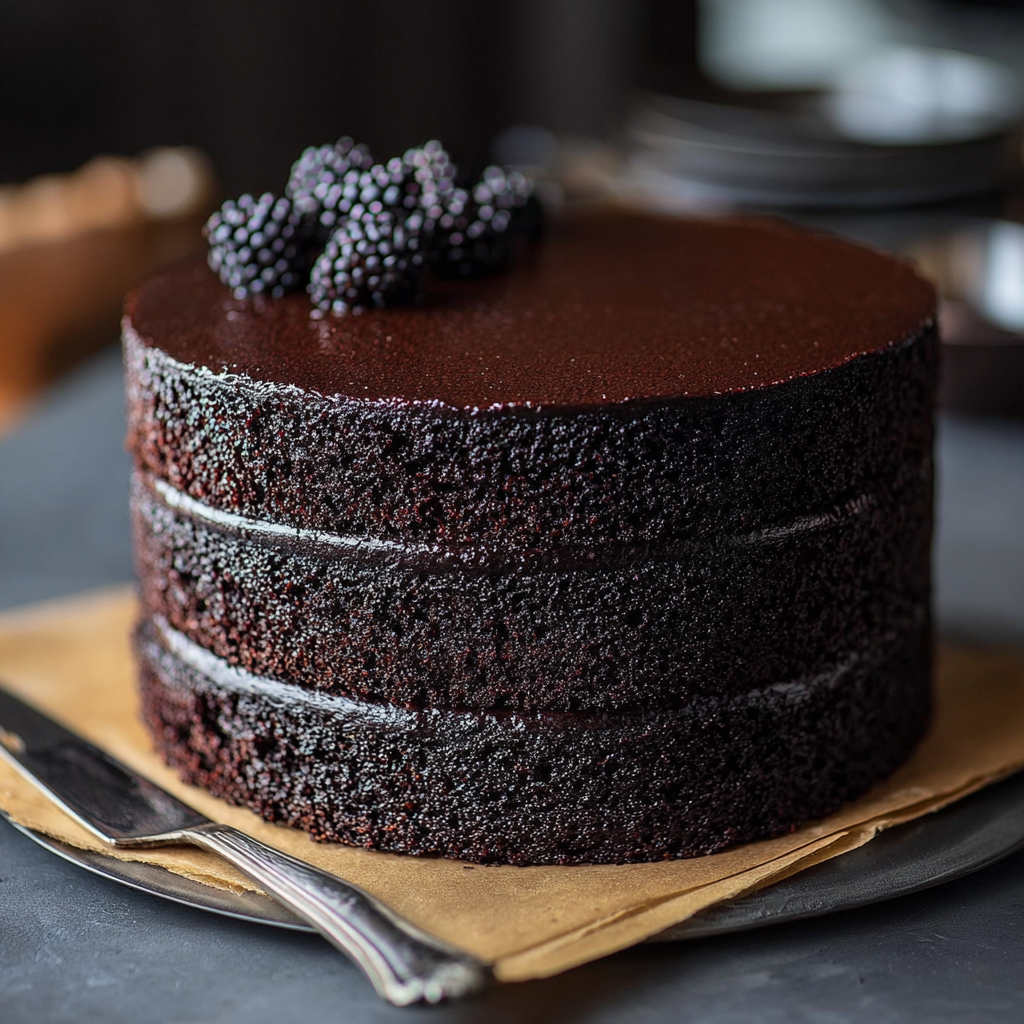
This black velvet cake brings elegance and drama to any dessert table without relying on food coloring. Its secret lies in black cocoa powder, which provides a striking color and rich, Oreo-like flavor. The result is a moist, dark cake layered with fluffy cream cheese frosting that tastes as impressive as it looks. With a few simple steps, you can create this decadent treat that stands out both in taste and appearance.
When I first made this cake for a friend’s gothic-themed birthday, jaws dropped at the elegant color and intense chocolate flavor. Now it is my go-to celebration cake whenever I want something memorable yet approachable.
Ingredients
- Black cocoa powder: brings the dramatic color and Oreo-style flavor. Use a high-quality Dutch-processed brand for the best result
- All-purpose flour: ensures a tender structure and crumb that supports generous frosting
- Sugar: balances the bittersweet cocoa and keeps the crumb soft
- Buttermilk: adds tanginess and reacts with baking soda for a velvet crumb. Choose full-fat buttermilk for richness
- Eggs: bind the ingredients together giving body and a savory hint
- Vegetable oil: keeps the cake moist longer than butter
- Baking soda and baking powder: ensure a tall rise and a light bite
- Salt: brightens the cocoa so the flavors hit every note
- Hot water or coffee: intensifies the chocolate taste and smooths out the batter for level layers
- Cream cheese (for frosting): lends a tangy creamy finish. Use brick-style for best texture
- Powdered sugar: sweetens and stabilizes the frosting
- Butter: makes the frosting indulgent soft and spreadable
- Vanilla extract: brings warmth and rounds out both cake and frosting flavors
- Fresh berries or chocolate shavings for garnish: bring a bright pop or a beautiful finish
Step-by-Step Instructions
- Prepare the Pans and Oven:
- Grease two nine-inch cake pans and line the bottoms with parchment paper rounds. Preheat the oven to three hundred fifty degrees Fahrenheit to ensure even baking when the batter is ready.
- Mix Dry Ingredients:
- Sift together the flour black cocoa powder sugar baking powder baking soda and salt in a large bowl. This not only combines evenly but also helps avoid lumps for a smoother batter.
- Blend Wet Ingredients:
- In a separate bowl whisk eggs buttermilk vegetable oil and vanilla extract until the mixture becomes glossy and thoroughly mixed. Doing this separately helps the cake bake evenly and binds everything together.
- Combine Wet and Dry:
- Add the wet ingredients to the dry bowl in stages whisking gently after each addition. Take care not to over-mix so the final cake remains light and velvety.
- Add Hot Water:
- Add hot water or freshly brewed coffee to the batter in a slow stream. Mix just until no dry patches remain. The batter will be thin but this ensures an extra moist crumb.
- Bake:
- Divide the batter between the prepared pans and smooth the tops. Gently tap each pan on the counter to release any trapped air bubbles. Bake for about thirty to thirty-five minutes until a toothpick inserted in the center comes out mostly clean. Cool in the pans for ten minutes then turn cakes onto a rack to cool completely.
- Make the Frosting:
- In a large bowl beat softened cream cheese and butter together until light and fluffy. Gradually add powdered sugar a bit at a time beating after each addition. Add vanilla extract and heavy cream then beat on high until you achieve a spreadable airy frosting.
- Assemble the Cake:
- Once cakes are fully cooled place one layer on your serving plate. Top with a thick layer of cream cheese frosting then place the second cake layer on top. Frost the sides and top generously using a spatula for smooth clean edges.
- Decorate:
- Finish with chocolate shavings or fresh berries for an eye-catching presentation. The black cake and white frosting are visually dramatic enough for any celebration.
 Save Pin
The first time I tried black cocoa powder I was amazed at how it transformed a basic chocolate cake into something with true restaurant wow-factor. Each bite feels just a little mysterious and special which is why my family now requests this version for birthdays and holidays.
Storage Tips
Store leftover cake in a covered container at room temperature for up to two days if it is unfrosted or lightly frosted. For cakes with cream cheese frosting keep in the refrigerator for three to five days but let slices come to room temperature before serving so the texture is soft and flavors bloom. For longer storage wrap slices tightly and freeze for up to three months. Thaw overnight in the refrigerator and bring to room temperature before eating.
Ingredient Substitutions
If you cannot find black cocoa powder opt for Dutch-processed cocoa but be prepared for a lighter result. For dairy-free needs substitute plant milk plus a tablespoon of vinegar for buttermilk and vegan butter and cream cheese for the frosting. For gluten-free cakes use a one-to-one gluten-free flour blend and add half a teaspoon of xanthan gum if not already included.
Serving Suggestions
This cake shines as a showpiece dessert for birthdays holidays or themed parties. Dress it up with fresh raspberries or blackberries for a fruity twist or add a drizzle of dark chocolate ganache for extra indulgence. For a unique touch sandwich a layer of raspberry preserves or salted caramel between the layers before frosting.
 Save Pin
Cultural and Historical Context
Inspired by red velvet’s classic technique but with a twist black velvet cake swaps food dye for black cocoa powder. This gives a rich sophisticated flavor and visual edge that is especially beloved for Halloween and modern celebrations. The original velvet cakes gained popularity in the early twentieth century for their soft tender crumb—a result of adding both an acid like buttermilk and alkaline like baking soda.
Commonly Asked Questions
- → What gives black velvet cake its dramatic color?
The striking dark hue comes from black cocoa powder, which is Dutch-processed for a deep, almost black finish, all achieved without any artificial food coloring.
- → Which frosting pairs best with black velvet cake?
Cream cheese frosting is the classic pairing. Its soft tang and creamy texture balance the bold cocoa notes, but vanilla buttercream or mascarpone whipped cream also work beautifully.
- → How do you keep the cake moist?
Using oil instead of butter and adding buttermilk helps maintain moisture and a tender crumb. Storing the cake wrapped and at the right temperature will also preserve its freshness.
- → What are some flavor variations or fillings?
Try fillings like raspberry preserves, salted caramel, or chocolate ganache for added complexity. Espresso, orange zest, or almond extract can give a unique twist to the classic flavor profile.
- → How should black velvet cake be stored?
Keep it wrapped at room temperature for a day or two, refrigerate if frosted with cream cheese, or freeze unfrosted layers for up to three months for best freshness and texture.
- → Can this dessert be made vegan or gluten-free?
Absolutely! Substitute plant-based milk, vegan butter, and egg replacers, along with a 1-to-1 gluten-free flour blend, for delicious results that fit dietary preferences.